How to Survive Google's Pending Panda Update

How to Survive Google's Pending Panda Update

It appears the Google search spam team has a busy year planned. Matt Cutts recently attended SMX west and gave details on what updates they have planned for 2013. And guess what? There will be an update of both Google Panda and Penguin this year

Surprised? Probably not. Google's updating their algorithm all the time -- some updates bigger than others, of course. What's the result? An unnerving feeling that your SEO standard operating procedures aren't totally up to date, because you're not sure if you are totally up to date on all the algorithm changes.

So with the Google Panda update expected to happen this weekend -- and if you have any ideas as to what it is, please leave it in the comments -- we thought it was the perfect opportunity to give a recap on all things Panda. That way, you can ensure you're caught up to date, and decrease the chances this pending algorithm update will hit you where it hurts. (In your SEO, that is.)

The Story So Far

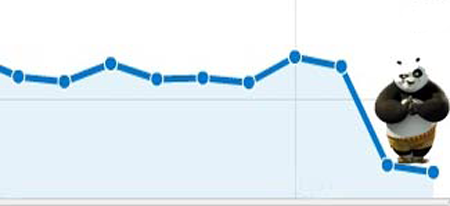
The first Google Panda update appeared on February 24th 2011 and if you were unlucky enough to be hit, your traffic probably looked a lot like this:

Google Panda Traffic Drop

Since that first update, Google went on to release a further 23 updates, with the latest happening on January 22nd of this year. The update this weekend is the last manual update of Google Panda, as Google is planning on making it part of its overall continuous algorithm. What the heck does that mean? It means good news for webmasters, as forthcoming refreshes to the update will be less intense, and by extension less noticeable to marketers. So going forward, Panda updates really won't rock your world like they might have been the past couple years.

The Google Panda Victims

Since the first Panda update, a lot of people have tried to figure out what marketing practices the updates affect. Google’s top search engineers, Matt Cutts and Amit Singhal, gave an interview to Wired in 2011 on the purpose of Panda, but instead of making you watch that and try to suss out what you need to know, we're just going to tell you right here what you need to know. If you know all this, good; you're totally prepared for the upcoming Panda update. If you're not caught up on some of this stuff, it's time to permanently update your SEO strategy so Panda doesn't take you down with a big, fuzzy (but adorable) punch. Here's what the major Panda updates have been created to address:

Read More go to original page here

READ MORE - How to Survive Google's Pending Panda Update

How To Add Facebook Like Button To Blogger Read more: http://www.trickiezone.com/2011/12/how-to-add-facebook-like-button-to.html#ixzz2RBFmZ6Sf

Step 1: Go to Template >> Edit HTML >> and tick Expand Widget Templates.
Step 2: Ctrl+F and find <data:post.body/> with this <b:if cond='data:blog.pageType != &quot;staticpage&quot;'> tag.
Step 3: Copy and paste the code after <b:if cond='data:blog.pageType != &quot;static
page&quot;'> tag.
Step 4: Save your template.

Standard Facebook Like Button

Code:
  1. <b:if cond='data:blog.pageType != &quot;static_page&quot;'>  
  2. <iframe allowTransparency='true' expr:src='&quot;http://www.facebook.com/plugins/like.php?href=&quot; + data:post.url + &quot;&amp;send=false&amp;layout=standard&amp;show_faces=false&amp;width=450&amp;action=like&amp;font=arial&amp;colorscheme=light&amp;height=35&quot;' frameborder='0' scrolling='no' style='border:none; overflow:hidden; width:450px; height:35px;'/></b:if>  

Facebook Like Button with Box Count

Code:

  1. <b:if cond='data:blog.pageType != &quot;static_page&quot;'>  
  2. <iframe allowTransparency='true' expr:src='&quot;http://www.facebook.com/plugins/like.php?href=&quot; + data:post.url + &quot;&amp;send=false&amp;layout=box_count&amp;show_faces=false&amp;width=55&amp;action=like&amp;font=arial&amp;colorscheme=light&amp;height=65&quot;' frameborder='0' scrolling='no' style='border:none; overflow:hidden; width:55px; height:65px;'/></b:if>  

Facebook Like Button with Button Count


Code:

  1. <b:if cond='data:blog.pageType != &quot;static_page&quot;'>  
  2. <iframe allowTransparency='true' expr:src='&quot;http://www.facebook.com/plugins/like.php?href=&quot; + data:post.url + &quot;&amp;send=false&amp;layout=button_count&amp;show_faces=false&amp;width=90&amp;action=like&amp;font=arial&amp;colorscheme=light&amp;height=21&quot;' frameborder='0' scrolling='no' style='border:none; overflow:hidden; width:90px; height:21px;'/>  
  3. </b:if>  


Customizations:

You can change the following:

  • The color by changing colorscheme=light to colorscheme=dark
  • The width and height.
  • The “Like” word to “Recommended” by changing action=like to action= recommend
  • Show faces by changing show_faces=false to show_faces=true.
  • And turn off Send by applying send=true to send=false.


  • font=lucida%2Bgrande
  • font=segoe%2Bui
  • font=tahoma
  • font=trebuchet%2Bms
  • font=verdana


For better instructions go to original page in here : http://www.trickiezone.com/2011/12/how-to-add-facebook-like-button-to.html

    READ MORE - How To Add Facebook Like Button To Blogger Read more: http://www.trickiezone.com/2011/12/how-to-add-facebook-like-button-to.html#ixzz2RBFmZ6Sf

    Google integrates Google+ comments from Blogger

    + blogger 

    A new option in Blogger.com allows for enhanced integration of Google+ into the Blogger service from Google. Thus, it is now possible that comments from Google+ appear on Blogger and vice versa. But first you have to link his blog with Google+.

    With the new integration now also comments that are made on Google+ appear on the blog. Logically, this also happens the other way around.

    Fountain-screenshot-EN

    "Your blog readers now have the opportunity to publish their comments for all or only for their circles on Google+. When reading the readers can also specify whether you only the newest or just want to see people from their circles all comments. 
    general rule is that you and your readers can each see only the comments that have received authorization. This not only a more targeted sharing content and comments allows but also potentially generate more traffic to your blog, "writes Google.

    The function can be activated in Google+ on the blogger dashboard. Just look at it, you can see for example in Blogger Buzz . It remains to be seen when and if Google will offer this feature for other website.

    READ MORE - Google integrates Google+ comments from Blogger

    Instantly Translate Foreign Blogs In Your RSS Feed with a Google Script


    If you want to read your favorite foreign news sites or blogs but don't speak the language, you'd usually have to head to the site and have it translated with Google Translate. However, tech blog Digital Inspiration shows off how to use Google Translate to automatically translate RSS feeds and send them to your favorite reader.

    If you exclusively use Google Reader, you can change your settings to automatically translate pages. However, if you use third party apps like Flipboard, Reeder, Feedly, or others, the process isn't automatic. Digital Inspiration's method uses a Google Script to translate the site, and then creates a RSS feed URL you can plug into your favorite reader. The process is pretty simple, and you only have to do it once for each foreign language site you want. Head over to Digital Inspiration for the full guide.

    Originally from this source : http://lifehacker.com/5973776/instantly-translate-foreign-blogs-in-your-rss-feed-with-a-google-script

    READ MORE - Instantly Translate Foreign Blogs In Your RSS Feed with a Google Script

    Javascript disable right click


    In some situations some web admins think disabling a right click on their web page is a good idea.


    The reason for disabling a right click could be to:

    • protect and hide source code

    • protect images on web page

    • disable copy and paste functionality...


    There are opinions that disabling right mouse click is a bad practice and you shouldn't do it on your site.
    It can prevent some novice users from stealing on your site but more
    advanced users will find a way (to get image or take a look on your
    source code).


    In this article you will find how to:


    • disable right click on whole HTML web page using onmousedown event

    • disable right click on whole page using attribute inside body tag

    • disable right click on some part of HTML page

    • disable right click on image using javascript

    No Right click (disabled) with javascript


    Disable right click using javascript on HTML page


    You can disable right click on your web page using javascript
    function which will show message box if right mouse button is clicked.


    Here is a code:


    <span style="font-weight:bold;"><font color="brown">
    <script type="text/javascript">
    function catch_click(e) {
    if (!e) var e = window.event;
    var right_click = (e.which ? (e.which == 3) : (e.button == 2));
    if (right_click) {
    alert('Right clicking on this page is not allowed.');
    return false;
    }
    }
    document.onmousedown = catch_click;
    </script>
    </font></span>

    Brief explanation of code: When mouse button is clicked javascript
    function catch_click is called. If right button is clicked message box
    pop up and right click is canceled.


    Disable right click on HTML page using body attribute


    This method prevents context menu to appear when right click happened
    without message box on HTML page. It is very easy to implement.


    You just need to add this attribute to body element:


    <body <span style="font-weight:bold;"><font color="brown">oncontextmenu="return false"</font></span>>


    Disable right click on only part of HTML page


    On the beginning of this article it was said that preventing users
    from using right click is a bad practice. So if you want to protect
    something on your page maybe is better practice to protect only this
    specific element.


    It is possible to use oncontext attribute on specific HTML element.


    To better explain we will show the example with HTML table with two
    columns. We will forbid right click only on First column. On Second
    column right click is possible.


    <span style="font-weight:bold;"><font color="brown"><Table>
    <tr>
    <td oncontextmenu="return false">
    First column (no right click)
    </td>
    <td>
    Second column
    </td>
    </tr>
    </Table>
    </font></span>

    On td tag attribute oncontextmenu is added and set to "return false". So on First column right click is disabled.


    No right click

    Second column

    Disable right click on image using javascript


    You can disable right click on image using the technique described in previous chapter. Just add oncontextmenu attribute inside img element.


    <img src="../PathToImage" <span style="font-weight:bold;"><font color="brown">oncontextmenu="return false"</font></span> />

    On the beginning of the article you can find image "No right click!" which can not be right clicked.

    Source : http://interestingwebs.blogspot.com/2013/03/javascript-disable-right-click.html

    READ MORE - Javascript disable right click

    How to make clickable picture in HTML


    This short tutorial will learn you how to make a clickable picture in HTML web page.


    What is clickable picture?


    Clickable picture is picture which will lead you to specific web page when you click on that picture.


    To better explain what is clickable picture take a look at image
    below this text. If you click this image, post "Make clickable links and
    clickable images" will be opened.


    Clickable picture


    HTML code for: How to make clickable picture


    <span style="font-weight:bold;"><font color="brown"><a href="URLToLinkedWebPage"><img src="URLImageLocation" /></a>
    </font></span>

    In HTML code for clickable image you need to replace:

    • URLToLinkedWebPage - with URL to web page you want to be opened when user click on image

    • URLImageLocation - with location of image


    Example:


    <span style="font-weight:bold;"><font color="brown"><a href="https://www.google.com"><img src="https://www.google.com/images/srpr/logo3w.png" /></a></font></span>

    Above HTML code display Google logo
    ("www.google.com/images/srpr/logo3w.png") and links to "www.google.com"
    when picture is clicked.


    http://interestingwebs.blogspot.com/2013/02/how-to-make-clickable-picture-in-html.html
    READ MORE - How to make clickable picture in HTML

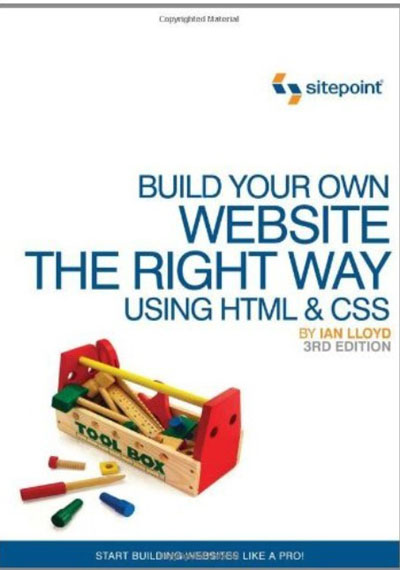
    Build Your Own Website The Right Way

    Build Your Own Website The Right Way Using HTML & CSS (3rd edition)

    Build Your Own Website The Right Way Using HTML & CSS (3rd edition)
    Published: 2011-07-30 | ISBN: 0987090852 | PDF | 500 pages | 11 MB
    READ MORE - Build Your Own Website The Right Way

    Google Website Optimizer Essential

    Google Website Optimizer Essential Training
    Google Website Optimizer Essential Training
    Flash Video | MOV / AVC, ~754 kb/s | 960x540 | Duration: 3 hours 37 mins | English: AAC, 160 kb/s (2 ch) | 702 MB
    Genre: SEO, Web Design, Development / Programming


    In Google Website Optimizer Essential Training, David Booth shows how to use Website Optimizer,
    Google's free tool for conversion optimization. Conversion
    optimization, or landing page testing, is the process of experimenting
    with content and design alternatives, displaying them to visitors, and
    comparing the results, with the goal of improving site performance in
    regard to marketing, sales, or other conversion metrics. The course
    covers theory and best practices, as well as a real-world implementation
    of A/B and multivariate testing.
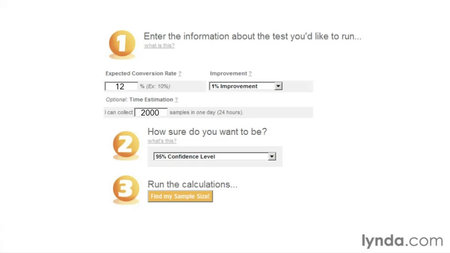
    Practical techniques for identifying areas for improvement, estimating
    sample size, choosing an experiment type, designing, launching, and
    validating an experiment, and analyzing Website Optimizer reports are included.

    Google Website Optimizer Essential Training

    Google Website Optimizer Essential Training

    Google Website Optimizer Essential Training
    READ MORE - Google Website Optimizer Essential

    Creating an Effective Content Strategy for Your Website

    Creating an Effective Content Strategy for Your Website

    Creating an Effective Content Strategy for Your Website

    Flash Video | MOV / AVC, ~103 kb/s | 960x540 | Duration: 1 hour 54 mins | English: AAC, 96 kb/s (1 ch) | 183 MB

    Genre: Web Design, Development / Programming


    Discover what it takes to be a content strategist: what they do, how do
    they do it, and why content strategy is so increasingly valued on the
    web (and a hot job category). Author Janine Warner shows you how to
    analyze, prioritize, and think strategically about content in many
    formats (text, images, videos, animations, and infographics) across many
    channels. In this course, Janine walks you through a series of
    decisions to transform an outdated, content-heavy website into a
    multifaceted, multimedia showcase that includes a blog, email
    newsletter, and social media profiles. Along the way, explore key
    content strategy documents and tools, including how to create a content
    inventory, gap analysis, and content matrix. The course also explains
    how content strategy often overlaps with information architecture, and
    how constantly testing your theories is the key to long-term success.


    screenshot

    Creating an Effective Content Strategy for Your Website

    Creating an Effective Content Strategy for Your Website

    Creating an Effective Content Strategy for Your Website
    READ MORE - Creating an Effective Content Strategy for Your Website

    Specialist Blog Writer Secrets and techniques For Very best Blogging Practices - ten Suggestions To Get A lot more Blog Site visitors


    Click Here for Specialist Blog Writer Secrets and techniques For Very best Blogging Practices - ten Suggestions To Get A lot more Blog Site visitors

    My ten Secrets and techniques For Acquiring A lot more Blog Site visitors: Make Them Yours!

    1. As
      a Specialist blogger, I have located that most instances my clients
      (the blog owners) are not so comfy working with social advertising and
      marketing techniques or are purely unaware of the good outreach of
      uncomplicated social media tools. But, if you have a Twitter account
      please advertise your blog by way of Twitter! 1 catchy blog matter can
      aid you create numerous responses by a uncomplicated technique like
      'Alert on most recent debate on XYZ subject matter - your responses
      welcome on my publish' followed by your blog website link!
    2. Actively
      seek out matters for your blog that are similar to your industry's most
      up-to-date controversy given that absolutely nothing heats up visitors
      curiosity as considerably as this twin sister to gossip does! You can
      truly double blog site visitors by employing buzz words in blog titles
      and posing open-ended inquiries that invite debate. Then get word about
      these most current blog posts out to all community members randomly and
      invite opinion. Folks really like to be considered smart adequate to be
      asked for their views!
    3. Conduct One query poll on a core theme in
      your blog niche, headlining it with the question and leaving answers
      open for a restricted time, say for a week. Mention you will choose One
      particular Very best answer from reader remarks
      - this will advertise wholesome competitors and worthwhile blog remarks
      that are on subject matter, as an alternative of the regular 'wonderful
      submit.' For instance, a well being blog can have raise the query 'What
      is your view on legalizing Marijuana?' and a style blog can put up a
      blog post on 'Finest way to clean leather boots?'
    4. Solicit
      knowledge sharing from your blog Guests and you will have a standard
      following that will be pleased to advise your blog, helping you
      encourage it on-line. For instance, everyone loves a bit of
      consideration, so grant that to your Guests and arrange a blog contest -
      some thing effortless like 'forgotten childhood games,' 'most romantic
      date venue' or 'my preferred coffee brand' are all queries that would
      show a human side of your Site visitors and promote them to speak about
      themselves. They are certain to return to speak some Far more subsequent
      time you publish - just don\'t forget to alert these responders!
    5. Integrate
      social websites like StumbleUpon with your blog promotion efforts and
      don\'t be shy about asking buddies to use it to enable you out. Although
      targeted traffic is initially slow, its steady and powerful for good
      quality blog visitors.
    6. Comment on other blogs and present a
      hyperlink to a relevant publish of yours that is on-matter. This is a
      fantastic but underneath-utilized way of diverting potential blog Site
      visitors to your blog supplied you have posted a subject matter that is
      connected, regardless of whether in a sure or negative way, to the
      existing blog article. This will arouse reader interest and advertise
      reviews.
    7. Usually acknowledge reviews from blog Site visitors.
      Quite a few bloggers discover it tedious to reply to responses or
      basically lag behind in responding to remarks, but if somebody has taken
      the time and initiative to respond to your article, it\'s a excellent
      sign you've managed to get their consideration. A friendly response can
      support you retain that reader, so make an effort to do that!
    8. Make
      reviews open and offered to all as an alternative of limiting time
      periods for normal blogs. This way even if your blog titles, tags or hot
      key phrases are observed in on-line searches 2 or three years down the
      line by Men and women searching for linked information, your blog earns
      that visitors too!
    9. Pick evergreen subjects for your blogs over
      time sensitive articles and stick with common curiosity matters that
      offer helpful data to Visitors or fill a gap. Maintain what you had for
      lunch beneath wraps, ditto for your pet peeves!
    10. Do not filter
      out the vital feedback as charged up opinions only make you appear Far
      more of a confident authority on the theme, displaying other Site
      visitors you are prepared to cope with opinions various from yours with
      out Acquiring private or upset
    11. Source: http://autoblogging-poster.blogspot.in/2010/10/specialist-blog-writer-secrets-and.html

    READ MORE - Specialist Blog Writer Secrets and techniques For Very best Blogging Practices - ten Suggestions To Get A lot more Blog Site visitors

    Four methods of adding CSS to HTML

    Four methods of adding CSS to HTML


    4 methods of adding CSS to HTML: link, embed, inline and import

    There is more than one way to add a Cascading Style Sheet (CSS) to
    your HTML document. In this short tutorial I will explain the strengths
    and weaknesses of the four main methods.


    Linking to a separate CSS file


    This is the most common method of attaching CSS rules to an HTML
    document. With this method all of your style rules are contained in a
    single text file that is saved with the .CSS extension. This file is
    saved on your server and you link to it directly from each HTML file.
    The link is just a simple line of HTML that you put in the <head> section of your HTML document, it looks like this:

    <code><link rel="stylesheet" type="text/css" href="mystyles.css" media="screen" /></code>


    Make sure you include the correct path to your CSS file in the href.
    If the CSS file is in the same folder as your HTML file then no path is
    required (like the example above) but if it's saved in a folder, then
    specify it like this href="foldername/mystyles.css". The
    media parameter specifies when the CSS rules are to be used. "screen"
    indicates for use on the computer screen. If you specify "print" then
    the rules will only be followed when the page is printed. You can
    include multiple CSS files if required.


    There are many advantages to linking to a separate CSS file. If you
    need to make a style change across your whole website then you only need
    to make the change once in your single CSS file. If you want to
    completely change the look of your website, again, you only need to
    update this one file. Check out CSS Zen Garden
    for the best example of this. Perhaps the best reason to have a
    separate CSS file is for speed. When a person first visits your website
    their browser downloads the HTML of the current page plus the linked CSS
    file. Then when they navigate to another page their browser only needs
    to download the HTML of that page, the CSS file is cached so does not
    need to be downloaded again. This can significantly increase browsing
    speeds on a website.


    Embedding CSS into the HTML


    You can also embed CSS rules directly into any HTML page. To do this you need to add the following code to the <head> of your HTML document:


    <code><style media="screen" type="text/css">

    Add style rules here

    </style></code>


    All of your CSS rules go between the style tags. As before, the media
    can be "screen" for your computer screen or "print" for printing.


    The disadvantage with this approach is the styles must be downloaded
    every time someone visits the page, this can cause a slightly slower
    browsing experience. However there are a few advantages. Because the CSS
    is part of the HTML document, the whole page exists as just one file.
    This can be useful if you are sending the page to someone via email or
    if it will be used as a template such as a blogger template. I use this
    method on my liquid-layout demos
    so when people view the source of the page they can see the HTML and
    the CSS code together. Another advantage of using this method is with
    dynamic content. If you are using a database to generate the page
    content you can also generate dynamic styles at the same time. Blogger
    does this - it dynamically inserts the colours for headings and other
    elements into the CSS rules embedded in the page. This allows users to
    change these colours from an admin page without actually editing the CSS
    in their blog templates.


    Adding Inline CSS to HTML tags


    Style rules can also be added directly to any HTML element. To do
    this you simply add a style parameter to the element and enter your
    style rules as the value. Here is an example of a heading with red text
    and a black background:


    <code><h2 style="color:red;background:black;">This is a red heading with a black background</h2></code>


    This is not a good method to use because it will bloat your HTML and
    make website maintenance a real headache. However it can be useful in
    some situations. One example could be if you are using a system where
    you don't have access to the CSS file - simply add your style rules
    directly to the elements instead.


    Importing a CSS file from within CSS


    Another interesting way to add CSS to a HTML page is with the import
    rule. This lets us attach a new CSS file from within CSS itself. Let's
    look at an example of how this is done then I will show a practical
    example of when you might use this method. To import a new CSS file from
    within CSS simply use the following rule:


    <code>@import "newstyles.css";</code>


    Just change "newstyles" to the name of your CSS file and be sure to
    include the correct path to the file too. Remember the path is relative
    to the current CSS file that we are in, if the CSS is embedded into the
    HTML page then the path is relative to the HTML file.


    Let's imagine we have a 1000 page website and we link to a CSS file
    from every page on the site. Now let's imagine we want to add a second
    CSS file to all of those pages. We could edit all 1000 HTML files and
    add a second CSS link or a much better way would be to import the second
    CSS file from within the first file. We just saved ourselves many hours
    of work!


    source here : http://matthewjamestaylor.com/blog/adding-css-to-html-with-link-embed-inline-and-import


    Happy CSS coding...

    READ MORE - Four methods of adding CSS to HTML

    CSS tricks you may not know

    source : http://www.webcredible.co.uk/user-friendly-resources/css/more-css-tricks.shtml

    has proven to be such a success that we decided it was time to offer you ten more CSS tricks that you may not know.

    1. Block vs. inline level elements


    Nearly all HTML elements are either block or inline elements. The characteristics of block elements include:


    • Always begin on a new line
    • Height, line-height and top and bottom margins can be manipulated
    • Width defaults to 100% of their containing element, unless a width is specified


    Examples of block elements include <div>, <p>, <h1>, <form>, <ul> and <li>. Inline elements on the other hand have the opposite characteristics:


    • Begin on the same line
    • Height, line-height and top and bottom margins can't be changed
    • Width is as long as the text/image and can't be manipulated


    Examples of inline elements include <span>, <a>, <label>, <input>, <img>, <strong> and <em>.


    To change an element's status you can use display: inline or display: block.
    But what's the point of changing an element from being block to inline,
    or vice-versa? Well, at first it may seem like you might hardly ever
    use this, but in actual fact this is a very powerful technique, which
    you can use any time you want to:


    • Have an inline element start on a new line
    • Have a block element start on the same line
    • Control the width of an inline element (particularly useful for navigation links)
    • Manipulate the height of an inline element
    • Set a background colour as wide as the text for block elements, without having to specify a width


    2. Another box model hack alternative


    The box model hack is used to fix a rendering problem in pre-IE 6 browsers on PC, where by the border and padding are included in the width of an element, as opposed to added on. A number of CSS-based solutions have been put forward to remedy this, so here's another one which we really like:


    padding: 2em;

    border: 1em solid green;

    width: 20em;

    width/**/:/**/ 14em;


    The first width command is read by all browsers; the second by all browsers except IE5.x on PC. Because the second command comes second it takes precedence over the first - any command that comes second will always override a preceding command. So, how does all this work?


    By placing empty comment tags (/**/) before the colons, IE5.0 will ignore the command. Likewise, by placing these empty comment tags after the colon, IE5.5 will ignore the command. By using these two rules in conjunction with each other, we can hide the command from all of IE5.x.


    3. Minimum width for a page


    A very handy CSS command that exists is the min-width
    command, whereby you can specify a minimum width for any element. This
    can be particularly useful for specifying a minimum width for a page.


    Unfortunately, IE
    doesn't understand this command, so we'll need to come up with a new
    way of making this work in this browser. First, we'll insert a <div> under the <body> tag, as we can't assign a minimum width to the <body>:


    <body>

    <div id="container">


    Next we create our CSS commands, so as to create a minimum width of 600px:


    #container

    {

    min-width: 600px;

    width:expression(document.body.clientWidth < 600? "600px": "auto" );

    }


    The first command is the regular minimum width command; the second is a short JavaScript command that only IE understands. Do note though, this command will cause your CSS document to invalidate so you may prefer to insert it into the head of each HTML document to get round this.


    You might also want to combine this minimum width with a maximum width:


    #container

    {

    min-width: 600px;

    max-width: 1200px;

    width:expression(document.body.clientWidth < 600? "600px" : document.body.clientWidth > 1200? "1200px" : "auto");

    }


    4. IE and width & height issues


    IE has a rather strange way of doing things. It doesn't understand the min-width and min-height commands, but instead interprets width and height as min-width and min-height - go figure!


    This can cause problems, because we may need boxes to be
    resizable should more text need to go in them or should the user resize
    text. If we only use the width and height commands on a box then non-IE browsers won't allow the box to resize. If we only use the min-width and min-height commands though then we can't control the width or height in IE!


    This can be especially problematic when using background images.
    If you're using a background image that's 80px wide and 35px high, then
    you'll want to make sure that the default size for a box using this
    image is exactly 80 x 35px. However, if users resize the text then the
    box size will need to expand gracefully.


    To resolve this problem, you can use the following code for a box with class="box":


    .box

    {

    width: 80px;

    height: 35px;

    }


    html>body .box

    {

    width: auto;

    height: auto;

    min-width: 80px;

    min-height: 35px;

    }


    All browsers will read through the first CSS rule but IE will ignore the second rule because it makes use of the child selector command. Non-IE browsers will read through the second one and will override the values from the first rule because this CSS rule is more specific, and CSS rules that are more specific always override those that are less specific.


    5. Text-transform command


    One of the lesser known, but really useful CSS commands is the text-transform command. Three of the more common values for this rule are: text-transform: uppercase, text-transform: lowercase and text-transform: capitalize.
    The first rule turns all characters into capital letters, the second
    turns them all into small letters, and the third makes the first letter
    of each word capitals.


    This command is incredibly useful to help ensure consistency in style across an entire website,
    particularly if there a number of content editors. Say for example your
    style guide dictates that words in headings must always begin with
    capital letters. To ensure that this is always the case, use text-transform: capitalize. Even if site editors forget about the capitalisation, their mistake won't show up on the website.


    It's also preferable to use text-transform: uppercase to capitalise words,
    as screen readers may pronounce shorter words in capital letters as
    acronyms. A great example of this is ‘CONTACT US’, which is pronounced
    as ‘contact U S’ by some screen readers.


    6. Disappearing text or images in IE?


    IE has a very
    strange bug where text or background images sometimes disappears from
    sight. These items are still actually there, and if you highlight
    everything on screen or hit refresh they'll often re-appear. Kind of
    strange, huh?


    This problem mostly occurs on background images and on text next to a floated element. To remedy the problem, simply insert position: relative
    into the CSS command for the disappearing element, and for some bizarre
    reason that'll usually fix the problem. If this doesn't work (it
    sometimes doesn't), assign a width to the offending element in the CSS
    and that should fix the problem.


    7. Invisible text


    Sometime you may actually want to make text invisible. Invisible text can be especially useful for screen reader users,
    perhaps to assign a label to a form item or insert a heading ahead of a
    section. Don't want to change the visual appearance by inserting these?
    Make them invisible and no one using a visual browser knows that
    they're there.


    You may also want to make text invisible if using a print or handheld CSS file, as some information may not need to be displayed on either of these mediums (see below for more on this).


    To make text invisible you can use display: none - easy! This works fine for hiding text from handhelds (if CSS
    is supported) and printed web pages, but isn't so great for many screen
    readers. Screen readers are now becoming too clever for their own good,
    and some will actually ignore the any text that has the rule display: none assigned to it.


    For screen readers users therefore, a new approach is needed: position: absolute; left: -9000px.
    This basically takes the text and positions it 9000px to the left of
    the left edge of the screen, essentially making it invisible.


    8. CSS document for handhelds


    A separate CSS document can be created for PDAs
    and mobile phones, and only activated when one of these devices is
    being used to access your site. More and more websites are creating
    separate CSS documents for printing,
    so web pages automatically become print-friendly when users choose to
    print them. You can also do the same for handheld devices.


    The following command is used to call up the CSS document for handhelds:


    <link type="text/css" rel="stylesheet" href="handheldstyle.css" media="handheld" />


    CSS commands in the handheld CSS file override any equivalent commands in the main CSS document. So, what commands should you place in this file?


    Ideally, you want handheld web users to avoid having to scroll across. To test this, open up your website in a regular browser window and resize it to 150px in width. Then, open up your main CSS
    file and insert some new commands at the very bottom of the document.
    The commands you place here should adjust the layout of the website so
    that it doesn't require horizontal scrolling at a 150px width. Then,
    open up a new document, cut and paste these new commands over, and save
    it as handheldstyle.css (or whatever name you want to give it).


    What your website offers to handheld web users should be
    quite different to what it offers on traditional web browsers, as the
    user experience is quite different. For further information, a book such
    as Handheld Usability is a great read.


    9. 3-d push button effect


    Back in the early days of the web, 3-d buttons that appeared
    to become pushed in when moused over were all the rage. At that time,
    this could only be achieved through images and JavaScript, but now with
    the advent of CSS we can go all retro and re-create this effect:


    Example link


    The main CSS commands you'll need are:


    a
    {

    display: block;

    border: 1px solid;

    border-color: #aaa #000 #000 #aaa;

    width: 8em;

    background: #fc0;

    }


    a:hover

    {

    position: relative;

    top: 1px;

    left: 1px;

    border-color: #000 #aaa #aaa #000;

    }


    Aside from these commands, you can insert any other commands
    to achieve the desired presentation effect - the only limit is your
    imagination!


    10. Same navigation code on every page


    Most websites highlight the navigation item of the user's
    location in the website, to help users orientate themselves. This is a
    fundamental requirement for basic usability, but can be a pain as you'll
    need to tweak the HTML code behind the navigation for each and every page. So can we have the best of both worlds? Is it possible to have the navigation highlighted on every page, without having to tweak the HTML code on each and every page? Of course it is...


    First of all, you'll need to assign a class to each navigation item:


    <ul>

    <li><a href="#" class="home">Home</a></li>

    <li><a href="#" class="about">About us</a></li>

    <li><a href="#" class="contact">Contact us</a></li>

    </ul>


    You'll then need to insert an id into the <body> tag. The id
    should be representative of where users are in the site and should
    change when users move to a different site section. When in ‘Home’ it
    should read <body id="home">, in ‘About Us’ it should be <body id="about"> and in ‘Contact Us’ <body id="contact">.


    Next, you create a new CSS rule:


    #home .home, #about .about, #contact .contact

    {

    commands for highlighted navigation go here

    }


    This basically creates a rule that only takes effect when class="home" is contained within id="home", and when class="about" is in id="about" and class="contact" is in id="contact".
    These situations will only occur when the user is in the appropriate
    site section, seamlessly creating our highlighted navigation item.
    READ MORE - CSS tricks you may not know

    Must Avoid Blackhat techniques

    Source : http://technokarak.com/top-black-hat-seo-techniques-you-should-avoid-for-better-google-rankingpart-1.html

    Hello
    everyone, I am going to do Part series of discussing various Black Hat
    SEO Techniques that should be avoided to get good Google Ranking. In the
    first part i am reviewing three techniques that are shown in the figure
    below:


    New Picture1 Top Black Hat SEO Techniques you should avoid for better Google Ranking[Part 1]


    Google
    changes its searching algorithm very frequently and updating the
    existing algorithm with more and new features to present better results
    to the visitors. SEO is the main technique that is being used by
    Bloggers and Web Administrators to get better ranking for their website
    in search results. SEO is ‘Search Engine Optimization’ and it ‘ is
    the process of affecting the visibility of a website or a web page in
    a search engine’s “natural” or un-paid (“organic”) search
    results.[jargon] In general, the earlier (or higher ranked on the search
    results page), and more frequently a site appears in the search results
    list, the more visitors it will receive from the search engine’s users
    ’[1]
    . There are many tutorials available on internet by various authors
    about the better SEO technique but none can match the impact of original
    and unique content. SEO can be done either correctly and lawfully which
    will surely result in better search and the other SEO is using Black
    Hat techniques which will land you penalize by Google and drop in search
    rankings. In this article I am going to three black hat techniques that
    you should avoid while performing SEO activity for your website or
    Blog.


    Avoid the following Black Hat Techniques:


    1) Cloaking


    It is the most practice Black Hat SEO
    Technique, Cloaking means fooling the Google Search. By fooling it means
    that presenting different content to Google than the actual content on
    the website or Cloaking can be defined as “Cloaking refers to the
    practice of presenting different content or URLs to human users and
    search engines [2]”. In [2] example of cloaking has been listed which
    are as follows:


    • Serving a page of HTML text to search engines, while showing a page of images or Flash to users
    • Inserting text or keywords into a page only when the User-agent requesting the page is a search engine, not a human visitor

    A more common and easy to understand
    example of cloaking can be like making Google thinks that your webpage
    contains data for Android Apps Development but after visitor click the
    URL page is navigating to some shopping site or any other site which is
    not development of Android Apps. Google continues monitors the search
    query and results and maintain the complete database and after
    performing various mining techniques these activities can be easily
    detected and penalise by Google. Some of the tools and online sites that
    can help monitoring the cloaking activity are given below.


    You can check your site and Blog through these services and be sure that you are not following any such activity.


    2) Keyword Stuffing


    Keyword
    stuffing means putting many keywords in your content on website. Putting
    irrelevant and unnecessary keywords after every two or three
    lines doesn’t going to work with Google anymore. It is the technique
    that is used in earlier days and got success but with the advancement of
    the Search Engine’s Algorithm this becomes Black Hat SEO Technique. So
    what is the threshold level of using keywords in the content? You can
    check keyword density using some of the online available tools like
    below:


    Check with these tools and optimize your post so that it will net penalize by Google for putting lots of keywords. 


    3) Duplicate or Copied Content


    It is the
    worst Black Hat SEO Technique that you can use and it is the most
    employed technique and most of the times by new Bloggers. Google index
    each page and post of your product and if there are more than one entry
    present for same topic and with same content then Google will mark those
    as Spam and may result in de-indexing of those pages from the search
    results. WordPress users can use plug-in which can easily find out the
    duplicate content and administrator can take the action accordingly.
    This is the Duplication of content within the site but what if you copy
    content from some other website then it comes under Copyright
    infringement and Google doesn’t like those pages. You can obviously
    write on the same topic but try to change the content and write it in
    your unique way and always check the plagiarism before posting the data.
    To check plagiarism online please visit the following links


    See the following screenshot in which I have check the plagiarism for the entire article. 


    New Picture 11 Top Black Hat SEO Techniques you should avoid for better Google Ranking[Part 1]


    It is 76% because i have used the links and some quotes for which i have give the reference.


    References:


    [1] Wikipedia


    [2] WebMaster Tools

    READ MORE - Must Avoid Blackhat techniques

    Reviews of Desktop Blogging Tools

    Thanks to Glen Stansberry and Smashing Magazine for this great article: http://www.smashingmagazine.com/2008/08/01/15-desktop-blogging-tools-reviewed/


    Desktop blogging tools can benefit
    designers-bloggers in a number of ways. They provide extra functionality
    that can significantly speed up the blogging process for both newbies
    and professionals.


    One of the main benefits of using a desktop client is the ability to
    comfortably write a post offline, and publish it later. Many clients
    also have a scheduled post feature, so you can define what time you
    would like to publish your articles. Some editors provide a spell
    checker, drafts saver, remote publishing and WYSIWYG-editor with
    advanced formatting options such as inserting media or structuring the
    post — they may be hard to deal with using standard online
    blogging-engines.


    Let’s take a look at 15 desktop blogging editors which can speed up the blogging process.
    Some are free and some cost a few dollars, but in the end all of these
    editors can significantly improve your workflow, regardless of your
    skills.


    Windows Live Writer (Windows)


    Windows Live Writer
    is an impressive blog editor, and is probably the cleanest one. It
    provides the familiar user interface that one would expect from usual
    Microsoft applications. Writing a blog entry with intuitive features
    like a rich text editor and spell checker is easy. Users also have the
    ability to quickly add images and other media.


    The distinctive feature that puts Live Writer ahead of the competition is that you can can add plugins to the editor. For instance, there are plugins that seamlessly integrate with Flickr and Facebook photos; word counting as well as many further features are available as well.


    Live Writer is useful for people who don’t necessarily want to mess
    with HTML and just want to quickly write a blog post, but it’s also
    great for more advanced users with the ability to add specific features
    with plugins.


    MarsEdit (Mac)


    The main advantage of MarsEdit
    lies in its ability to integrate with other text editors. The client
    integrates cleanly with BBEdit, SubEthaEdit, TextMate, or TextWrangler.
    It has a simple yet robust user interface. Users can define powerful
    markup macros to insert commonly used snippets of code. The tool works
    with WordPress, Blogger, TypePad, Movable Type, LiveJournal, Drupal, and
    Vox. You can also quickly scan your Flickr library, then insert an
    image into your blog post with the click of a button.


    Another nifty feature is the preview functionality. The tool allows
    you to build a template to match your blog, then let MarsEdit’s live
    preview show you how your posts will look before you publish them.
    Extensive AppleScript support makes it possible to add further features.
    Price: $29.95. A free 30-days-trial-version is available as well.


    BlogDesk (Windows)


    BlogDesk
    is a robust, multi-language blog editor that supports all of the
    popular blogging platforms except Blogger. If that isn’t a problem for
    you, then you’ll love the unique and intuitive features BlogDesk
    provides. The Image Wizard allows you to upload and edit pictures, without editing images in image processing applications. You can also define frequently used phrases and keywords to speed up your writing time, much like TextExpander (Mac).


    Links can be easily inserted and edited. If you link to local files
    (such as MP3 or PDF), BlogDesk will automatically upload them.
    Dictionaries in 14 languages are available for the integrated spell
    checker. Posts already published can be edited afterwards and deleted
    directly from the server. In the Notebook you can insert and rearrange
    text before you actually use it in your weblog entry. For your
    convenience you can create multiple categories where text can be saved
    separately.


    Zoundry Raven (Windows)


    Zoundry Raven
    is a free advanced WYSIWYG-blog editor with XHTML editing, drag and
    drop from browser-functionality. It also provides the Unicode (UTF-8)
    support, quicklinks and a template-based preview. Users can manage
    multiple blogs online and offline and use a built-in indexer that allows
    to see posts by blogs, links, tags and images.


    Zoundry Raven supports Blogger, TypePad, MovableType, MetaWeblog and
    LiveJournal. The tool is available as a portable application which you
    can use on your flash/thumb drive. Finally, you can use Raven to create
    and modify your WordPress Pages just like any other blog post and set
    WordPress tags as well as import tags from all of your posts.


    It is worth mentioning that Zoundry Raven also has an integrated HTML validator built into the code view and includes a publish menu to finalize your decisions, tags, trackbacks, etc.


    Ecto (Mac)


    Ecto is one of the most popular blog editors, and has earned the respect of some top bloggers like Darren Rowse. It’s a powerful tool with all typical features (Rich text editor, spell check, draft saving, etc.), but it also allows you to extend the functionality by using plugins,
    much like Windows Live Writer. Amazon’s affiliate scheme seamlessly
    integrates in Ecto and makes it easier for you to link to a particular
    Amazon product page.


    Ecto also has support for Flickr and del.icio.us. In addition, ecto
    also lists the tags you have used with del.icio.us and Flickr, so that
    you can reuse them for your blog entries. The only drawback is that the
    software costs $17.95, but you can try it out for free for 21 days.


    w.bloggar (Windows)


    w.bloggar
    is a professional blog editor for advanced users who are fairly
    technologically savvy. It’s snappy and has a lot more advanced features
    built-in than Live Writer. While the interface isn’t as intuitive or
    elegant as Live Writer and some of the others, it’s a useful little
    editor.


    With w.bloggar you can save posts locally for further publishing,
    import text files, post to many blogs and ping to Weblogs.Com, blo.gs,
    Technorati and ping-o-matic. Also, you can download a portable version that you can take with your anywhere on a USB drive. Perfect for bloggers on the go!


    Thingamablog (Window, Mac, Linux)


    Thingamablog is a hybrid of a blog editor and RSS-feed reader.
    It’s not quite as polished as other blog editors, but is great for
    someone needing a cross-platform blog editor. Setting up the blog is a
    bit cumbersome for the first time, but not unbearable. You’ll need to
    have Java Virtual Machine downloaded and running on your machine to work.


    Thingamablog has a few advanced features that are different from
    other blog editors. You can import RSS feeds, and you can post to your
    blog while reading your RSS feeds. It’s a nice program for bloggers who
    typically write news-related posts. The editor also allows publishing
    remotely to your blog via email and saving entries as drafts.
    Thingamablog is released under the terms of the GPL.


    Qumana (Windows, Mac)


    Qumana
    has an interesting feature that isn’t found in other blogging
    platforms. If you are interested in joining an ad network for your blog,
    Qumana has a built-in ad network (Qads) that allows you to insert ads into your post.


    You can use Qumana when you are offline. Save your blog posts to your
    hard drive and upload whenever you like. Useful for bloggers on the
    move. Apart from standard features the editor has a handy little feature
    called the DropPad, which adds drag-n-drop capability
    to snag links, pictures and text to a desktop pad. Qumana is very
    intuitive and is definitely an option worth consdering for both newbies
    and advanced bloggers.


    Scribefire (Firefox)


    Scribefire
    is quite different from the other blog editors as it is a Firefox
    extension. When you want to blog about the page you are currently
    viewing, hit “F12″ and the scribefire extension pops up in the
    lower-half of your browser. You can blog about a specific web page without having to leave the browser. You can also click an icon to move blogging frame into a separate tab, if you’re going to need some more space.


    Scribefire isn’t as feature-rich as an editor like Ecto or BlogDesk,
    but it is fast and easy, and works well for everybody in a hurry.


    BlogJet (Windows)


    If you are a power blogger, BlogJet
    is definitely a solution worth considering. While the application costs
    around $60, it manages to combine a number of useful tools in one clean, intuitive interface. It supports most blogging services, integrates with RSS-readers and also allows you to use keyword-shortcuts (like BlogDesk).


    BlogJet cares about typography: it automatically replaces quotes and
    dashes with proper ones as you type. If you are on the road and there is
    no Internet-connection, or if you want to finish your post later, save
    it as draft. Then you can get back to finishing and publishing it. The
    tool also has Flickr and YouTube support, Spell Checker, Word Counter
    and Blog Statistics, Post Management and Searching. And BlogJet can
    automatically insert the title and the artist of the song playing in
    iTunes, Winamp or Windows Media Player.


    If you are looking for a free alternative, stick with BlogDesk. It
    has almost the same features and is free. However, if a beautiful,
    intuitive design is important to you, then give BlogJet a shot. You
    won’t be disappointed.


    Flock (Mac, Windows, Linux)


    Flock
    is a web-browser that has a built-in blogging tool. The blogging tool
    allows you to blog directly from the page, similarly to Scribefire, with
    a keyboard shortcut or a mouse click. However, the interface on Flock
    is a bit nicer, and has a slightly more seamless integration
    than in case of Scribefire and Firefox. Also you can use the web
    clipping tool to save and store clips of information in your browser.


    Flock is an optimal tool for simple bloggers who don’t need a lot of bells and whistles that come with other blogging editors.


    Post2Blog (Windows)


    On the surface, Post2Blog appears to be a very simple blogging tool. If you dig under the hood for a bit, you’ll notice that this lightweight blogging tool
    has some pretty nifty features. You can quickly add amazon affiliate
    links to your posts. It even has plugins for Firefox and Internet
    Explorer for quickly blogging a web page.


    The tool also has a “Portable Mode” support, integration with RSS
    Bandit and Sharp Reader — you can post selected items from these RSS
    readers using Post2Blog plugin. You can also add Technorati,
    Del.icio.us, Buzzwords, 43 Things tags to your posts and earn money
    using “Insert Amazon Link” feature.


    The only drawback is that the interface isn’t as elegant or intuitive
    as other Windows blogging platforms, and the tool isn’t supported by
    the developers.


    Bleezer (Mac, Windows, Linux)


    Bleezer
    is a light piece of software that has all standard features as well
    some advanced functionality which one would expect from robust editors.
    Spell checking, pinging services, uploading files and FTP capabilities
    are available. It’s a handy little tool that is quick and efficient.
    Again, it doesn’t have the beautiful design that BlogJet has, but it’s
    free and works smoothly. Bleezer is an optimal choice for advanced
    bloggers who can appreciate the advanced functionality that the software
    provides.


    Using Bleezer you can work with every blogging service
    (even Blogger). You can also create custom markup by defining your own
    key strokes for custom HTML markup. As usual, you can also compose posts
    offline and post them when you want to. Windows and Linux users should
    extract the .zip file into a directory and double click the .jar file to
    run. You will need Java Virtual Machine.


    Further Desktop Publishing Tools


    Let’s take a look at the brief overview of further desktop blogging tools which may be also useful:


    • AirPress (cross-plattform, Adobe Air)

      AirPress was a promising client with a file I/O API for saving FLV
      webcam videos record and ActionScript / JavaScript bridging to interact
      with the text editor made in HTML/Javascript. In the last release
      AirPress supported only WordPress and DotClear. The project’s official
      page (AdobeAir.org) has somehow disappeared few months ago. We don’t
      know the reason. 
    • SharpMT (Mobile, Windows Mobile 5/6, PocketPC)

      harpMT is an offline blogging tool that is designed for
      MovableType-based systems. There are three versions of the application:
      desktop, PocketPC, and SmartPhone, all of which share the same file
      format for offline drafts. The application uses text boxes for post
      entry: it was a design goal to not support WYSIWYG. It also includes the
      infrastructure to support plugins and XML-RPC calls that were designed
      to inteface with MT or TypePad. Freeware.


    Conclusion


    If you have little experience in blogging you might
    try either Flock, Windows Live Writer or Scribefire. Those three have
    fairly intuitive interfaces and don’t have all the advanced features
    that more robust programs have. Also, they are free so you can check out
    what application better manages to cover your needs.


    Advanced bloggers looking for a bit more firepower
    should try Ecto, BlogJet or BlogDesk. BlogDesk works especially well for
    bloggers who frequently use photos in their posts (Image Wizard).
    Windows Live Writer and Ecto have extra functionality built in, as they
    both allow you to install plugins to add specific features.


    Every desktop blog editor is a great benefit to any blogger’s
    toolkit, as it saves time and has features that traditional blog
    platforms don’t always have.

    READ MORE - Reviews of Desktop Blogging Tools

    Create Vertical Accordion Menu

    If you want to add a navigation menu, with hovering effect and drop down menu capability in blogger blog to give it a more website like feel, this is how you do it.
     The menu we are going to add looks like.
    Now ,as with any customisation this too has two parts
    1. A CSS edit and
    2. The real code 
    The CSS code ;  To define the appearance we have to add the following code to the style sheet , just before the style sheet declaration ends. Search for "]]" in the browser.Now copy the following code preceding the red line and paste it before the ]] < /b:skin >

    /* verticalaccordion

    ------------------------------------------------*/

    .verticalaccordion>ul {

    margin: 0;

    padding: 0;

    list-style:none;

    width: 580px;

    }

    .verticalaccordion>ul>li {

    display:block;

    overflow: hidden;

    margin: 0;

    padding: 0;

    list-style:none;

    height:40px;

    width: 580px;

    /*


    Now Save the template.

    2. Adding the code.
                                  You may add the code as widget or as HTML in the code editor window. I would recommend the widget since it will be easier to maintain in the long run. Do the following steps
    1. Add the HTML widget in blogger
    2. Copy the following piece of code on it and add whatever content you want in the blue regions provided.The code is self explanatory and simple I think. You may remove the comments if you don't want them

    <div class="verticalaccordion">

    <ul>

    <li>

     <h3>Header 1</h3>

     <div>

      <a href="link you want to put">Home</a><br/>

      <a href="link you want to put">Home</a><br/>

     </div>

    </li>

    <li>

     <h3>Header 2</h3>

     <div>

      <a href="link you want to put">Home</a><br/>

      <a href="link you want to put">Home</a><br/>

     </div>

    </li>

    <li>

     <h3>Header 3</h3>

     <div>

      <a href="link you want to put">Home</a><br/>

      The text ,if any ,you want to put

     </div>

    </li>

    <li>

     <h3>Header 3</h3>

     <div>

      <a href="link you want to put">Home</a><br/>

      <a href="link you want to put">Home</a><br/>

     </div>

    </li>

    /*--.add as many tabs as you want , just by repeating the above code block from <li>to </li>

    ------------------------------------------------*/

    </ul>

    </div>


    Now you save the widget and save the template. Your new web template with drop down menu is ready !!

    If you find any bugs in this do let me know. I have tested it in my own website and it looks perfectly OK ..

    Original tutorial
    here


    READ MORE - Create Vertical Accordion Menu