Balloon Tips Previews and Examples

/*---------- balon tips -----------*/
a.bt{
position:relative;
z-index:24;
color:#3CA3FF;
font-weight:bold;
text-decoration:none;
}

a.bt span{ display: none; }

/*background:; ie hack, harus mengubah sesuatu untuk menampilkan di IE*/
a.bt:hover{ z-index:25; color: #aaaaff; background:;}

a.bt:hover span.balontips{
display:block;
position:absolute;
top:0px; left:0;
padding: 15px 0 0 0;
width:200px;
color: #993300;
text-align: center;
filter: alpha(opacity:90);
KHTMLOpacity: 0.90;
MozOpacity: 0.90;
opacity: 0.90;
}

a.bt:hover span.atas{
display: block;
padding: 30px 8px 0;
background: url(http://lh3.ggpht.com/_pt7i0nbIOCY/SzIcnNeAr-I/AAAAAAAACek/ol5o6rqB5Qw/bubble_thumb.gif) no-repeat top;
}

a.bt:hover span.tengah{
display: block;
padding: 0 8px;
background: url(http://lh3.ggpht.com/_pt7i0nbIOCY/SzIcrZtXeiI/AAAAAAAACes/f3SeQ8tdw5A/bubble_filler_thumb%5B1%5D.gif) repeat bottom;
}

a.bt:hover span.bawah{
display: block;
padding:3px 8px 10px;
color: #548912;
background: url(http://lh3.ggpht.com/_pt7i0nbIOCY/SzIcnNeAr-I/AAAAAAAACek/ol5o6rqB5Qw/bubble_thumb.gif) no-repeat bottom;
}

/*---------- balon tips END-----------*/

1. The link must be declare by class="bt".
Link dalam code HTML bentuknya seperti ini <a href="http://example.com"></a> after declared then : <a class="bt" href="http://example.com"></a>

2. Next, Declare baloontips. Panggil code balontips dengan menuliskan <span="balontips"></span>. insert between link code.

3. You can adding picture by <span="atas"></span>. Insert between link code "balontips".

4. For Picture the code just like this <span="tengah"></span>. Insert between link code "balontips" dibawah code "atas". And this the text will shown.

5. Picture code just like this <span="bawah"></span>. Insert in "balontips" below "tengah".

You can see the complete code here:
<a class="bt" href="URL SOBAT">
kata-kata terserah deh..
<span class="balontips">
<span class="atas">
</span>
<span class="tengah">
Tempat sobat tulis info tentang link dan akan keluar sebagai bentuk balon
</span>
<span class="bawah">
</span>
</span>
</a>


example 1 :

PUT THE MOUSE HERE


TEXT HERE


example 2 :

HEI YOU HERE!!!

Tulisannya di sini
Ini contoh gambar nya:
dan adanya ruangan kosong di antara adalah karena enter diatara tag span jadi harus ditulis satu line supaya aman, ganti baris diganti pakai tag


Example 3 :

Arahkan MOUSE sobat ke tulisan iniNah tipsnya akan muncul seperti ini. Bagus kan??
Ini contoh gambar nya:


Example 4 :

Arahkan ke sinitext tanpa link dan


Example 5 :

Arahkan ke sinitext tanpa link dan menyamarkan button yang sudah dibuat dengan javascript


READ MORE - Balloon Tips Previews and Examples

Weather Widgets

Having the latest
weather updates on your blog keep your site alive and fresh for your
visitors. The easiest way to show off your local weather forecast on
your website is with weather widgets, which can easily be implemented in
your blog. Each weather widget displays the temperature, wind details,
and much more.


Ibegin Weather Widget

Just enter your
City, Zip Code, or State to show your local weather forecast. This
weather widget will show the current weather and weather forecast with
small icons.


WeatherBugWidget

This WeatherBug widget comes in multiple sizes which display your local weather forecast.

50x250, 180x150, 160x600, 300x250 , 125x125 and 728x90.


Weather.com Live Weather Widget

Another nice weather widget  by Weather.com, which can easily be implemented in the sidebar of your blog!

WidgetBox Weather Widgets

Choose from a large selection of widgets to show of your local weather.

WeatherReports Widget

Lets you choose the theme of your weather widget.


How to Add these Widgets to your Blog?

Please take note that all of the widgets above can easily be implemented
into your blog. These weather widgets are for Blogger, WordPress,
Typepad, and all the other blogging platforms. Go to the website and
customize the widget, then copy and paste the HTML code into your blog.
READ MORE - Weather Widgets

Post Ratings by Outbrain and Social Bookmarking Widget


Post Ratings by Outbrain

Let your users give your post a star rating from one to five.


Social Bookmarking Widget

This widget lets your users to easily bookmark your blog posts at the bottom of each post.


READ MORE - Post Ratings by Outbrain and Social Bookmarking Widget

Currently Online Readers Widget

Currently Online Readers Widget

A small widget which display how many users are currently online. The
widget also indicates which pages are currently being looked at.
READ MORE - Currently Online Readers Widget

Useful Twitter Widget for Blogger

Twitter is continuing to grow at a most overwhelming rate. As more and more people use twitter...be sure to utilize these twitter resources on your blog or website as a tool to to expand and connect with your twitter community.


Widgets and buttons are a great way to grab your readers attention and hence increase your twitter community. Below you will find links to different sites where you can attain the source code for these widgets and icons. Please enjoy thoroughly!

Twitter Widgets

ReTweet Button
A powerful twitter widget which allows your readers to easily share your blog posts. The button also displays a live count of the amount of times the post has been tweeted! ReTweet allows you to choose from two different sizes of buttons.

TweetMeMe Button
This twitter widget is very similar to the ReTweet Button but is stylized with a green interface.

BackType TweetCount Widget
The widget also counts the number times a certain URL has been tweeted. The great thing about this counter is that you can fully customize it. Choose the background color, border color, text color, etc.

Twittley
Yet another twitter button which displays the number count of tweets in real-time.

TwitterCounter
This widget shows off how many people are following you on twitter. Surely, you'll be able to impress a few tweeters.

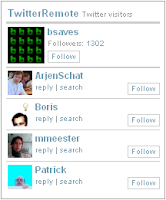
TwitterRemote
This widget shows which twitter users recently visited your blog or website.
twitter icon picture

TwitStamp
This badge displays your latest tweet with many different styles to choose from.
twitter icon picture

Chris' Original Twitter Badge
Chris has created a snazzy looking twitter badge which loads in no time.


TwitGif
Create a twitter badge for your blog which scrolls through your most recent tweets.

Twitt-Twoo
A WordPress Plugin which displays your twitter status.
twitter icon picture

Twitter Tag
Here is an automatic updating twitter image for your website or blog.


TwitSig Badge
This twitter image updates with your latest tweet by creating a new image every time you update your status. With this in mind, the twitter badge shouldn't take too much time to load on your blog.


Official Twitter Profile Widget
This widget loops through your tweets and has a full range of customization options. The twitter widget allows you to choose the color scheme, dimensions, and whether or not to loop through your old tweets as well.

Add Twitter to MySpace
The MySpace Flash Widget integrates Twitter into your MySpace profile page. This is a great twitter widget for myspace!
twitter icon picture

Twitter Gadget for Blogger
Simply display your recent updates on twitter as a list with this gadget. Also featuring a "Follow me On Twitter" link at the bottom of the widget.
twitter icon picture

Go2Web20 Badge
A simple image which floats on the side of your blog and directs readers to your twitter page when clicked on. Choose whether or not to display "Follow Us", "Follow Me", "Follow", or "My Twitter" in the image. Most people choose the Follow Me on twitter widget instead of the follow us on twitter button because it sounds more personal. You may also customize whether or not to display the twitter widget on the left or right side of your webpage.
twitter icon picture

TweetSnap
TweetSnap creates an image for your twitter account which will always display your latest tweet.
Bsaves

TwitterSticker
Another website which creates an image of your latest tweet. TweetSticker allows you to customize the font color, font size, text padding, and text wrap.


Twitterati Badge
A unique twitter widget which displays your twitter friends. Click on one of your friends and you'll be directed to their actual website.

Twitter Buttons and Icons

225 Buttons from TwitButtons.com
TwitButtons allows you to easily copy and paste their button code into your site.
Twitter Button from twitbuttons.com

80 Buttons from TwitterButtons.com
Make sure to click "More Twitter Buttons" at the bottom of their site to see the full collection. This follow us on twitter widget is my favorite!


Cute Twitter Bird by The Design SuperHero
3 Variations of the Twitter Bird with 5 different Resolutions.
twitter icon picture

Twitter Bird by WeFunction
3 more adorable variations of the twitter bird.
twitter icon picture

The Social Bird Icon Set
20 Wonderfully original twitter icons by popular artists for your inspiration. These icons have been released by InspiredMagazaine.
twitter icon picture

TweetBird Icon
1 icon which comes in 512×512, 256×256, 128×128, 64×64 and 32×32 pixel sizes.
twitter icon picture

TweetaBird Icon Set
2 more cute icons by LittleBoxOfIdeas. Featuring a twitter bird cheerleaders and a queen twitter bird.
twitter logo picture

Twitter Icon Promo Pack
53 Twitter Icons by WebTreats for you to grab and use on your site.
twitter logo picture

German Twitter Buttons by MTS
10 more twitter buttons for you to enjoy!


Twitter Graphics by Graphic Leftovers
16 twitter graphics in different shapes and forms; such as eggs,lightbulbs,bottle caps, and more.


Twitter Birds by Inaliblast
8 flying twitter bird icons.


Twitter Bird Icon Set by ProductiveDreams
6 High Quality transparent PNG twitter birds.


Free Tweet Tweet Vector Icon Set
1 Twitter bird with 4 differnet poses, created by ProductiveDreams as well.


Randa Clay Twitter Graphics
18 twitter buttons for gaining new followers.


Happy Birds by WebDesignFM
4 Happy go lucky twitter birds that will encourage both your faithful followers and potential followers.


Twitter Buttons by Blog Marketing Web
31 attractive buttons to enhance the twitter experience.


Is that Everything?

If there are any useful twitter resources that I've missed, please feel free to let us know by leaving a comment. Also, don't forget to subscribe because we'll be coming out with the The Best Twitter Apps and Tools in the near future... Stay Tuned!
READ MORE - Useful Twitter Widget for Blogger

Adding Digg Widget

This tutorial explains how to integrate a Digg Button into your blogger template, which will be displayed in each of your blogger posts. The button displays the amount of times each post has been dugg and lets users digg directly from your blog.


Here are the Steps:


  1. Make sure to Backup your Template!
  2. Open your blogger template, click Expand Widget Templates, and search for the code below:
  3. Add this code below directly above the searched code above:
  4. Now Preview and Save your Template!
READ MORE - Adding Digg Widget

Random Post Widget

This widget can definitely bring some excitement to your blogger powered blog. Letting your readers surf your blog to the fullest extent by creating a link to a random post in your blog's sidebar. Besides providing fun for your blog, hopefully your visitors will stay on your site for longer periods of time.


Installation and Customization:

  • Click button below to complete Installation:

  • Once you have installed the widget, you can change the link text. The default value is "View Random Post". To change this, view the code and search for "View Random Post", and change it to any desired text.
Those are all the steps necessary to implement the Random Post Widget to blogger. I hope you and your readers thoroughly enjoy it!
READ MORE - Random Post Widget

Making Cloud Posts Widget


This widget is perfect for blogspot users who desire a simple tag cloud
for their Categories. The Labels Cloud can easily be implemented
within the sidebar of your blog and will match your template
wonderfully.


Steps for Implementation

Step 1: Back it Up

Always make sure to back up your
Blogger Template before doing anything else!


Step 2: The Labels Gadget


Make sure that you have the Labels Page Element installed. If you haven't already...
  1. Go to Layout >Page Elements .
  2. Click "Add a Gadget" and then add the "Labels" gadget.
Step 3: Locating the "Old Code"
  1. Now go to Layout >Edit HTML
  2. Make sure that the "Expand Widgets Template" box is unchecked.
  3. Now we need to search for the code that looks like this.
    <b:widget id='Label1' locked='false' title='Tags' type='Label'/>
    Your code may look a little different. So try using your browser's search tool to find type='Label'.
Step 4: Replacing the "Old Code" with the "New Code"
  1. Once you've located type='Label', remove the whole line of code that looks just like the code mentioned in part 3 of step 3.
  2. Replace this code that you've just deleted with the code below:
    /*
    Distributed by John Smith at WidgetsForFree.blogspot.com
    */ <b:widget id='Label1' locked='false' title='Tags' type='Label'>
    <b:includable id='main'>
    <b:if cond='data:title'>
    <h2><data:title/></h2>
    </b:if>
    <div class='widget-content' style='text-align: justify;'>
    <script type='text/javascript'>
    /*
    Simple Blogger Tag Cloud Widget
    by Raymond May Jr.
    http://www.compender.com
    Released to the Public Domain
    */
    
    //Settings / Variables
    var max = 150; //max css size (in percent)
    var min = 70; //min css size (in percent)
    var showCount = false;  // show counts? true for yes, false for no
    var minCount = 1;  // what is the minimum count for a tag to be shown? 1 for all
    
    
    //Begin code:
    var range = max - min;
    
    //Build label Array
    var labels = new Array();
    <b:loop values='data:labels' var='label'>
    labels.push(&quot;<data:label.name/>&quot;);
    </b:loop>
    
    //URLs
    var urls = new Array();
    <b:loop values='data:labels' var='label'>
    urls.push(&quot;<data:label.url/>&quot;);
    </b:loop>
    
    //Counts
    var counts = new Array();
    <b:loop values='data:labels' var='label'>
    counts.push(&quot;<data:label.count/>&quot;);
    </b:loop>
    
    //Number sort funtion (high to low)
    function sortNumber(a, b)
    {
    return b - a;
    }
    
    //Make an independant copy of counts for sorting
    var sorted = counts.slice();
    
    //Find the largest tag count
    var most = sorted.sort(sortNumber)[0];
    
    //Begin HTML output
    for (x in labels)
    {
    if(x != &quot;peek&quot; &amp;&amp; x != &quot;forEach&quot; &amp;&amp; counts[x] >= minCount)
    {
    //Calculate textSize
    var textSize = min + Math.floor((counts[x]/most) * range);
    //Show counts?
    if(showCount)
    {
    var count = &quot;(&quot; + counts[x] + &quot;)&quot;;
    }else{
    var count = &quot;&quot;;
    }
    //Output
    document.write(&quot;<span style='font-size:&quot; + textSize + &quot;%'><a href='&quot; + urls[x] + &quot;' style='text-decoration:none;'>&quot; + labels[x] + count + &quot;</a></span> &quot; );
    }
    }
    </script>
    <br/>
    <span style="font-size:80%;float:right;">Powered by <a href="http://www.widgetsforfree.blogspot.com">Blogger Widgets</a></span>
    </div>
    </b:includable>
    </b:widget>


Step 5: Previewing the New Tag Cloud

Before saving the template make sure to click preview. The new tag
cloud should now be visible. If not, make sure that you've completed
all the steps correctly.
READ MORE - Making Cloud Posts Widget

Best SEO Sites for Increased Traffic Tips

As
many of you know, Search Engines are the most substantial source of
traffic for almost any blog on the web. The blogs without any traffic
from Google will never have the chance to be shared with the world. In
order to increase your traffic, you must optimize your blog so that
Search Engines are attracted to it. Which is also known as SEO (Search Engine Optimization).


So here is a list of useful SEO sites where you can learn how to harness the power of google.


The List

Courtney Tuttle

Join Courtney's Internet Marketing School and you will definitely gain
vital knowledge when it comes to search engine optimization.


The Keyword Academy

This is personally my favorite SEO site run by Courtney Tuttle and Mark
Butler. You'll learn more in one of their posts than you will in 50 of Darren Rowse's Posts.


Grizzly's Online Blog

He's got some great strategies for making an income online along with useful SEO tips.


Search Engine Land

Search Engine Land is a hub for news and information about search engine
marketing, optimization and how search engines work for searchers.


Daily Blog Tips

Improve your blog with Daily Blog Tips. A fast paced blog featuring
articles on blog design, SEO, promotion, monetization and more


Matt Cutts: Gadgets, Google, and SEO

talk about Google, SEO, and Gadgets. But mostly Google.


SEOmoz

Search Engine Marketing News & Tips


Search Engine Journal


Pronet Advertising

Pronet Advertising is a weblog about Neil Patel's personal experiences in online marketing.


Search Engine Guide

The small business guide to search engine marketing. Articles from the
top names in the industry cover topics including SEO, PPC, SEM,
blogging, social media, adsense, adwords, Google, Yahoo, MSN and
Internet marketing.


Online Marketing Blog

All about the intersection of search engine & social media marketing


Marketing Pilgrim

Andy Beal discusses news from the search engine industry, blogging, rss and other internet marketing.


Search Engine Watch

Search Engine Watch provides news and tips about search engine marketing
(SEM), search engine optimization (SEO), and searching the Web. We
offer daily news & analysis of the search industry, including the
latest on Google, Yahoo, Microsoft and Ask.


Get Elastic

Ecommerce articles on internet retail, online marketing, social media,
SEO, and killer ecommerce tips from Elastic Path Software; Featuring the
Get Elastic ecommerce podcast - conversations with ecommerce industry
insiders.


Web Analytics World

Manoj Jasra's insight on Web Analytics and the Search Marketing
Industry. Also including Interviews, Technology Reviews and Podcasts


BlogStorm

Search engine optimization & internet marketing blog


Small Business SEM

Small Business SEM by Matt McGee | SEO and Marketing Discussion for Small Businesses


SEO Scoop

SEO Scoop is a popular search engine optimization blog that focuses on SEO tips, theories and news.


Search Engine Roundtable

Search engine optimization news and resources
READ MORE - Best SEO Sites for Increased Traffic Tips

Change the Title Tags in Blogger for More Search Engine Traffic

By default Blogger displays the blog title first, followed by the name of the post. As you might notice this is not good when it comes to SEO.
It's important for the name of the post to come before the name of
your blog, especially when it comes to google search results. Learn how
to make your post title show up first so that you can reel in more traffic from the search engines.


Why Change the Titles?

It's quite important to have the Post Title + Blog Title arranged
accordingly because this is how you would want your blog to be
displayed on google's search results. This way more people will click
on your link when searching google because the post title is more
relevant than your post name.

Example Google Search Results:

You are most likely to click on the bottom image when searching google
for the keywords "image reflection generator". The reason being is that
your mind reads text from left to right. So it makes sense to have the more important title on the left.


How to Change the Titles:

  1. Go to Layout>edit HTML in your Blogger dashboard.
  2. Search for this tag: <title><data:blog.pageTitle/></title>
  3. Replace this tag with the following code:
  4. <b:if cond='data:blog.pageType ==
    &quot;index&quot;'>
    <title><data:blog.title/></title> <b:else/>
    <title><data:blog.pageName/> |
    <data:blog.title/></title> </b:if>
  5. Save your template and you should see the results in your web browser as depicted in the images below.
  6. It may take a few days for the changes to show
    up on the google search results. I guarantee you that you will start
    receiving more traffic from google once you are re-indexed!


READ MORE - Change the Title Tags in Blogger for More Search Engine Traffic

Change Default Favicon

READ MORE - Change Default Favicon

Related Posts Widget for Blogger / Blogspot

Now here is wonderful hack for displaying links to related posts beneath each of your blog posts. The related articles
are chosen from other posts in that same category/label/tag. With this
hack many of your readers will remain on your site for longer periods of
time when they see related posts of interest.


Preview of Related Posts Links:


Updates:

If your related posts have not been showing up lately: See How to Fix!


How to Add Related Posts Widget to Your Blog?

  1. Go to Layout >Edit HTML in your Blogger Dashboard.

  2. Back up your existing Template before making any changes!
  3. Make sure to check the "Expand Widget Templates" box.
  4. Search for the </head> tag.
  5. Add the following code just before the </head> tag.
  6. <style> #related-posts { float : left; width : 540px;
    margin-top:20px; margin-left : 5px; margin-bottom:20px; font : 11px
    Verdana; margin-bottom:10px; } #related-posts .widget { list-style-type :
    none; margin : 5px 0 5px 0; padding : 0; } #related-posts .widget h2,
    #related-posts h2 { font-size : 20px; font-weight : normal; margin : 5px
    7px 0; padding : 0 0 5px; } #related-posts a { text-decoration : none; }
    #related-posts a:hover { text-decoration : none; } #related-posts ul {
    border : medium none; margin : 10px; padding : 0; } #related-posts ul li
    { display : block; background :
    url("https://blogger.googleusercontent.com/img/b/R29vZ2xl/AVvXsEhfL5o7ym-OIey9PO3tsHz1RObN_xZQ2t4zqKshXMkFBCKLiVl5Q2G60ZdZgvw5lkbbMySkWuIejOIP4QFmyEF0CuPsPNQJPruUQ542senboFFLc86jqVqz7wZBagJapl8qUF-ISVJkHO4/")
    no-repeat 0 0; margin : 0; padding-top : 0; padding-right : 0;
    padding-bottom : 1px; padding-left : 21px; margin-bottom : 5px;
    line-height : 2em; border-bottom:1px dotted #cccccc; } </style>
    <script
    src='http://theblogtemplates.com/scripts/Related_posts_hack.js'
    type='text/javascript'/>
  7. Now search for <data:post.body/>. In some of the templates this code may look like this

    <div class='post-body>

    or

    <data:post.body/>
  8. Add the following code just beneath the code you just searched for.

    <b:if cond='data:blog.pageType == "item"'>

    <div id="related-posts">

    <font face='Arial' size='3'><b>Related Posts :
    </b></font><font color='#FFFFFF'><b:loop
    values='data:post.labels'
    var='label'><data:label.name/><b:if cond='data:label.isLast
    != &quot;true&quot;'>,</b:if><b:if
    cond='data:blog.pageType == &quot;item&quot;'>

    <script expr:src='&quot;/feeds/posts/default/-/&quot; +
    data:label.name +
    &quot;?alt=json-in-script&amp;callback=related_results_labels&amp;max-results=5&quot;'
    type='text/javascript'/></b:if></b:loop> </font>

    <script type='text/javascript'> removeRelatedDuplicates(); printRelatedLabels();

    </script>

    </div></b:if>
  9. Now Save your Template and you're done!

Customization

  • In order to change the number of maximum related posts being displayed for each label, search for the code below (within the code given in step 7) and change the number "5" to any desired number.
  • max-results=5
READ MORE - Related Posts Widget for Blogger / Blogspot

10 Facebook Widgets and Tools for Your Website and Blog

Facebook is the largest social networking site with more than 400
million active users and is growing larger every day! Make sure to use
these Facebook widgets for your website or blog to connect with your
large Facebook audience. You can use these tools to easily share certain
profile information, websites, blogs, and businesses with the Facebook
community.


Personal Profile Widgets

Like Badge

Display your Facebook pages for all to see.


Profile Badge

Create a Facebook profile badge to share selected profile information on
your website. A profile badge will allow your users to easily connect
with you and add you as a friend.


Photo Badge

This photo badge allows you to share your Facebook photos on websites
and blogs. Choose from a vertical, horizontal, or two-column layout and
also choose the number of photos to be displayed.


Basic Widgets for Website or Blog

Like Box

This allows your users to publish their content and activity to Facebook.

Share Button

A powerful facebook widget which allows your visitors to share your content on Facebook! An excellent Facebook widget for blogger.


Page Badge

Lets you share your Facebook page (one that you have created) information on your website.


Twitter Link

Connect your Facebook page with Twitter. Whenever you update your
Facebook page, your twitter followers will be updated as well with a
tweet. A great Facebook widget for your website!


Developers Widgets for Website or Blog

Like Button

Allows facebook users to share web pages from your website on their profile.


Comments Box

Lets your users comment on your website content with their Facebook account.


Recommendations

Provides your website users with personalized suggestions for pages to visit.


Live Stream

Lets Facebook users to post and share content in real-time.


Activity Feed

Lets users know what their facebook friends are doing on your website through comments and likes.


Login Button

Displays a login button along with profile pictures of facebook friends who have already signed up.


Facepile

Shows profile pictures of people who have liked your facebook page or have signed up for your webpage.


Registration

Another way for users to sign up for your site.
READ MORE - 10 Facebook Widgets and Tools for Your Website and Blog

Recent Posts Widget Improved

One of the most annoying things of the
Blogger Post Feed was that it is sorted by date of post-update. As a
consequence, old posts that were updated appeared on the feed as if they
were new. Very annoying if the alteration is just a minor one, for
example repairing a broken link, or correcting a small mistake.

Well,
this problem (if we may call it a problem) has been solved now by
Blogger. You can have your post feed sorted by Published date, or by
Updated date.

If you have the Recent Posts Widget installed to
your Blog, there is a slight modification in the code you have to make.
Edit the Page Element, and change the code like this:

<script src="http://blog-unity.blogspot.com/feeds/posts/default?orderby=published&alt=json-in-script&callback=showrecentposts"></script>


Notice the orderby-parameter: there are 2 possible values: published and updated. Omitting the parameter is the same as updated.

The Recent Posts Widget Installer has been improved, and now supports the orderby-parameter.
READ MORE - Recent Posts Widget Improved


Picasa Album Widget


Picasa is the free-to-download,
easy-to-use, and Google-Pushed software tool to manage all your digital
pictures. You can upload your pictures to your Picasa Web Albums. Now,
wouldn't it be nice to have these albums available on your Blog? That is
where this new widget comes in.

This widget will show your public Picasa Webalbums in your sidebar, and links to Picasa itself.
Go to install this widget to your Blog.

In the widget installer, you have to enter the URL of your Picasa Web Albums. So if your Picasa Web Album is stored at http://picasaweb.google.com/yourname, that is what you have to enter in the installer's inputfield.
In the skin of your template, you can add CSS-styling for a new class, bbpicasabox.
An example of the styling definitions is given below:

.bbpicasabox {
border: solid 1px #000000;
padding: 5px;
background: #efefef;
margin-bottom:5px;
width: 180px;
text-align:center;
}

.bbpicasabox a:link, .bbpicasabox a:visited {
text-decoration:none;
}

.bbpicasabox a:hover {
text-decoration:underline;
}

.bbpicasabox img {
border-style:none;
}
READ MORE -

BlogToC Widget Released

The job is done. We now have a complete
interactive Table Of Contents. Click the button in my sidebar to display
the TOC. You can sort the TOC by Post Title by clicking the column
header. Click it again, and it is sorted in reversed order. The same way
if you want to sort the posts by date: newest first, or oldest first.
And by clicking on one of the labels in the TOC filters all posts with
that label. Click the column header to return to the full ToC.

Here is how to install it to your Blog.

Step 1: Back Up your Template.

Step 2: Add a HTML Page Element
Edit your template in HTML-mode, and look for the <b:section> with id=main. This is the section that holds the Blog posts.
Change that line as follows:

<b:section class='main' id='main' maxwidgets='2' showaddelement='yes'>

Save the template and switch to the Page Elements Tab.
Add a HTML page element above your Blog Posts element.
Leave the title blank. Add the following html:
<br /><div id="toc"></div><br />

Save your template.

Step 3: Add a Sidebar HTML-element
Now add a HTML-element to the sidebar. Set the title to "TOC".
For the contents, enter:
<br /><div id="toclink"><a href="javascript:showToc();">Show TOC</a><br/><br/></div><br /><script style="text/javascript" src="http://kpn.planet.nl/oosti468/downloads/blogtoc.js"></script><br /><script src="http://YOURBLOG.blogspot.com/feeds/posts/default?alt=json-in-script&max-results=999&callback=loadtoc"></script><br />


Replace YOURBLOG with the name of ...... exactly.
Oh yes, and save.

Step 4: Add custom styles to the skin of your template.
New id's and classes are:
#toc : the div-wrapper that contains the TOC
.toc-header-col1 : header of column 1
.toc-header-col2 : header of column 2
.toc-header-col3 : header of column 3
.toc-entry-col1 : cell in column 1
.toc-entry-col2 : cell in column 2
.toc-entry-col3 : cell in column 3

For your convenience: Beautiful Beta uses the following styling:
<br /><style type="text/css"><br />#toc {<br />  border: 0px solid #000000;<br />  background: #ffffff;<br />  padding: 5px;<br />  width:500px;<br />  margin-top:10px;<br />}<br />.toc-header-col1, .toc-header-col2, .toc-header-col3 {<br />  background: #ffd595;<br />  color: #000000;<br />  padding-left: 5px;<br />  width:250px;<br />}<br />.toc-header-col2 {<br />  width:75px;<br />}<br />.toc-header-col3 {<br />  width:125px;<br />}<br />.toc-header-col1 a:link, .toc-header-col1 a:visited, .toc-header-col2 a:link, .toc-header-col2 a:visited, .toc-header-col3 a:link, .toc-header-col3 a:visited {<br />  font-size:80%;<br />  text-decoration:none;<br />}<br />.toc-header-col1 a:hover, .toc-header-col2 a:hover, .toc-header-col3 a:hover {<br />  font-size:80%;<br />  text-decoration:underline;<br />}<br /><br />.toc-entry-col1, .toc-entry-col2, .toc-entry-col3 {<br />  padding-left: 5px;<br />  font-size:70%;<br />}<br /></style><br />


You can add this to the <b:skin>-part of the template, or insert it in the sidebar widget.

Enjoy!
READ MORE - BlogToC Widget Released

Beyond the 100 posts limit

After a lot of trial and error, and
without having any success to develop a decent piece of programming to
call JSON-feeds recursively, I suddenly had a flash of insight in how we
can cross the 100 posts limit of the Table of Contents Widget. It's all
because of Annie,
one of those friends in the Blogosphere that makes me (and others)
think. She has 101 blog posts, and is in dire need of a Table of
Contents that can list all 101 of them. Well, check out my sidebar, the
link will show Annie's table of contents, with all 101 of them!

The new BlogToc Widget release is updated in several ways:
- it now supports > 100 posts
- the link is more user-friendly
- a note is added displaying number of posts and filter applied

If
you have more than 100 posts, you have to duplicate the
JSON-script-call that is in your sidebar several times, each time with a
different start-index. If you have more than 100 posts, you need 2
calls like this:

<script src="http://YOURBLOG.blogspot.com/feeds/posts/default?alt=json-in-script&start-index=1&max-results=100&callback=loadtoc"></script>
<script src="http://YOURBLOG.blogspot.com/feeds/posts/default?alt=json-in-script&start-index=101&max-results=100&callback=loadtoc"></script>

If you go beyond 200, you will have to add another line, starting at start-index=201 and so on.
It is as simple as that. Took me DAAAAAAAAAAAYYYYYYYYYYS to come up with it.

There
is a new class added, .toc-note, that you can use to style the
top-line. I used a simple styling, a 5px left-padding and a 80% font
size.

Next stop: adding customization options (especially language).
READ MORE - Beyond the 100 posts limit

Speeding Up BlogTOC


Some of you who are using my (much
appreciated) BlogTOC widget have mentioned the long load times of their
blog as a result of the BlogTOC widget. Also, some of you want to
display the Table of Contents automatically, without the visitor having
to click on the Show TOC link.

Well, I will share some ideas with you regarding this subject.

Speeding up stuff
If
you implement the BlogTOC widget in the standard way, the entire code
of the widget is placed in a Blogger Page Element, usually somewhere at
the top of you blog.
Now, while your Blog is loading, all code is
processed from top to bottom. The piece of code that is the most
time-consuming is the code that retrieves the Blogger Feed, parses it,
and puts the data in a set of javascript arrays. This slows down
loading, but once the data has loaded displaying it is done
lightning-fast.
A good solution is, to move the retrieval-code to a page element that is completely at the bottom of your blog page.
I have moved the code to the bottom of the footer, and that has sped up loading a lot.
The code you have to move is this:


<script src="http://yourblog.blogspot.com/feeds/posts/default?alt=json-in-script&start-index=1&max-results=100&callback=loadtoc"></script>


Automatic display of TOC
If you want the TOC to auto-display, add a simple line of javascript code at the end:


<script type="text/javascript">showToc();</script>


READ MORE - Speeding Up BlogTOC

Google Books Widget

Want to share your library with friends,
family and even the rest of the world? If that's the case, you can use
my new Google Books Library Widget. Please take a look and experiment
with this new widget, and let me know what you think about it.


Google Books

In Google Books you can create your own Library. Take a look here
to see my small test library. As you can see, there are 2 books in this
library, and I have written a small review for each of them. Creating
your own Google Books Library is very easy. First of all, you need to
have a Google account. As a Blogger user, you probably have one. After
signing in on your Google account, select "more" from the menubar on the
Google main page. This opens a small pop-up menu, where you can select
"Books". This brings you to the Books-page, where you start creating
your Library by "Importing Books". You can easily add books to your
Library by entering a list of ISBN-numbers. Google will look up all
bookdata. After importing some books, return to the Library page (click
on "My Library" in the menubar), to see your Library Listing. Now you
can add comments, reviews, and a ranking (0-5 stars) to your books.
After setting up your Library, it is time to move on to creating the
Google Books Library Widget.

Creating the Widget
Creating the Widget is done in a few easy steps:
  1. Get the URL of your Google Books Library;
  2. Create a Widget with Yahoo Pipes;
  3. Add the Widget to your Blog.

It will take less than a minute to set it up.

1. Get your Google Books Library URL
Go
to your Google Books Library page. Select the contents from your
browser's address bar by right-clicking on it and selecting "copy" from
the popup menu.

2. Create the Widget with Yahoo Pipes
Go to my Google Books Library Pipe
by clinking on the link. In the entry-field, enter the URL by
right-clicking and pasting the URL you just copied. Click the "Run Pipe"
button. Your Library data are retrieved, and displayed as a list of
titles and descriptions.
If the output is as you expected, go on to the next step.

3. Add the Widget to your Blog
Now
click on "Get as a Badge". Badge is the Yahoo-word for Widgets. This
will bring up the Badge Configuration Window. In this window, click on
"Customize the size, type and settings of your Badge". In the
entry-field again paste your Google Books URL and click "Next". Now
select "Blogger" as the destination for your Badge. This brings you to
the familiar Blogger-screen, where you can select the Blog, and enter
the heading for the new Page Element. Click on "Add Widget", and
afterwards view your Blog.
READ MORE - Google Books Widget

Weather Report Widget

Widgetizing your Blog is the new thing to explore here on Beautiful Beta. Ramani shows how to add random Einstein quotes to your Blog. Phydeaux3 started all this showing Flickr Puppies, and even Hoctro
now shows a Flickr Zeitgeist widget. So it is time that Beautiful Beta
follows these fellows, with a useful Weather Forecast Widget. And
ofcourse a tutorial on how to create this widget on your own Blog and
make it easy-to-install for your readers.

You have to follow 3 easy steps:
  1. Create the widget
  2. Add it to your Blog
  3. Add an Install-button to your Blog


Step 1: Create the Widget

Go to WeatherReports.com, scroll down and click Add WeatherReports To Your Site.
In
the next screen, enter your city, select the colors and style of the
weatherbox. After entering all your selections, you will go to the next
screen automatically. Take a look at the preview, and select and copy
the HTML-code.


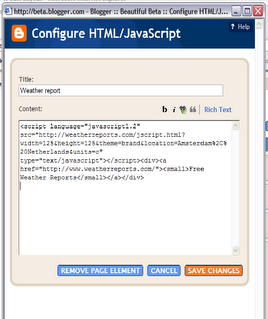
Step 2: Add the Widget to your Blog

Add
an new HTML page element to the sidebar of your Blog. Paste the code
that you copied into the page element, and set its title to "Weather
Report".

Don't save it yet, but go to step 3.

Step 3: Add an Install-button

Now
we are going to add a button, that installs the widget on your visitors
blog when it is clicked. In fact, we'll add a form with several input
fields, but only the button will be visible. Here we go.

<form action="http://beta.blogger.com/add-widget" method="post">
<input value="Weather Report" name="widget.title" type="hidden"/>
<textarea style="display:none;" name="widget.content">

&lt;script
type="text/javascript" language="javascript1.2"
src="http://weatherreports.com/jscript.html?width=125&height=125&theme=brand&location=Amsterdam%2C%20Netherlands&units=c"&gt;</script>&lt;div><a
href="http://www.weatherreports.com/"&gt;<small&gt;Free
Weather Reports&lt;/small&gt;</a></div>
</textarea>
<input value="Install to Blog" name="go" type="submit"/>
</form>


The
text between the <textarea>-tags is the html of your widget.
Please notice that each < is replaced with &lt;, and that each
> is replaced with &gt;.

Now save the page element and view your Blog.

For an example look here.

If you want more information on how to add third-party widgets to your blog, take a look at these help pages.
READ MORE - Weather Report Widget

New Recent Comments Hack

Recent comments can be displayed in the
sidebar of your Blog using the Feed page element. As a Feed-url you can
provide "http://yourblogname/feeds/comments/full" to get the last 5
comments, with author and name. That's the standard functionality, and I
really didn't like it at all. The standard comments-feed has a few
things missing. First of all, the first few words of the comment are
displayed as a link, but clicking the link brings you to the top of the
post-item page in stead of to the comment itself. That is because of a
bug in the link that is provided by Blogger. Second, I want to see on
what post a person has commented. The feed doesn't provide for the post
title, but we could obtain it from the link - and that is where this
hack kicks in.

Our objective is to create a
Recent Comments widget, that displays recent comments in the following
format: "On [date & year] [author] commented on [post title]:
[comment-summary] (more)".

Here is how you do it.

Step 1: Make a backup of your template.

Step 2: Add a standard recent comments widget to your Blog.
From
the dashboard select your Blog and click Layout. Go to the Template tab
and select Page Elements. In your sidebar add a Feed page element.
Enter your comment feed url.


Tick Item dates and Item sources on.


Save your template and view your Blog. You now have a standard recent comments widget.

Step 3: Add some javascript to the head of your template.
If you added my social bookmarking hack, you can skip this step.
If
not, go to the Template tab, click Edit HTML, and add the following
line of code to your templates head, just above the </head>-tag:
<script src='http://home.planet.nl/~hansoosting/downloads/beautifulbeta.js' type='text/javascript'/>

Save the template.

Step 4: Replace the widget coding
Go
to the Template tab, and click Edit HTML. Now find your sidebar, and
look for the new widget you just created. It will look something like
this:

<b:widget id='Feed2' locked='false' title='Recent comments' type='Feed'/>

Now click Expand Widget Templates, and look for the widget. Use Ctrl-F to find it, using it's ID (in this example Feed2).
Replace the entire widget by the following code:

<b:widget id='Feed2' locked='false' title='Recent comments' type='Feed'>
<b:includable id='main'>
<h2><data:title/></h2>
<div class='widget-content'>
<ul expr:id='data:widget.instanceId + "_feedItemListDisplay"'>
<b:loop values='data:feedData.items' var='i'>
<li>
<b:if cond='data:showItemDate'>
<b:if cond='data:i.str_published != ""'>
<span class='item-date'>
On&#160;<data:i.str_published/>
</span>
</b:if>
</b:if>
<b:if cond='data:showItemAuthor'>
<b:if cond='data:i.author != ""'>
<span class='item-author'>
&#160;- <data:i.author/> commented on
</span>
</b:if>
</b:if>
<script type='text/javascript'>getPostTitle(&quot;<data:i.alternate.href/>&quot;)</script>&#160;:
<span class='item-title'>
<data:i.title/>&#160;<script

type='text/javascript'>getCommentLink(&quot;<data:i.alternate.href/>&quot;)</script>
</span>
</li>
</b:loop>
</ul>
<b:include name='quickedit'/>
</div>
</b:includable>
</b:widget>

Save your template.

Your hack is implemented now.

Tech stuff.
I
started with the standard-widget. First I canged the order of the
<data>-elements to date, author, comment-summary. The
comment-summary is represented by <data:i.title/>. In the standard
widget, the comment summary is embedded in an anchor that links (or
should link) to the comment. The consruction looks like this:

<a expr:href='data:i.alternate.href'><data:i.title/></a>

The
link-address of the <data:i.alternate.href/>-field has the
following format:
"http://yourblog.blogspot.com/year/month/posttitle.html#number".
We
will use this link to parse the posttitle from it, and to retrieve the
correct comment-permalink. The correct permalink to the comment has the
folowing format:
"http://yourblog.blogspot.com/year/month/posttitle.html#comment-number".

I
wrote 2 js functions. The first function, getPostTitle, is handed the
alternate.href, and writes the post title as a hyperlink to the
post-item-page to the document. The second function, getCommentLink, is
handed the alternate.href, builds the correct permalink, and displays it
as a (more)-link.
READ MORE - New Recent Comments Hack

Delving into JSON feeds

Developing my latest JSON-based widgets
was done with a lot of trial and error, without a good understanding of
the JSON-format and lacking knowledge of how to access the feed and
retrieve the data. So this weekend I did some research and developed a
small javascript program to analyze the feeds. It is tech stuff, so
don't worry if you don't understand it.

I found some documentation on the JSON-feed format, based on Google Calendar. A little later I discovered a simple tutorial on how to browse through JSON objects.

I
changed this into a recursive javascript function, that browses the
complete JSON-feed-tree, and displays all keys and all values. You can
use is to research any JSON-feed.

Create a simple HTML-page, using the following code.

<html>
<head>
<script type='text/javascript'>
function listkeys(feedobj,depth) {
for (key in feedobj) {
for (var i=0; i<depth; i++) document.write('- ');
document.write(key+' = '+feedobj[key]+'<br/>');
listkeys(feedobj[key],depth+1);}
}

function showfeedcontent(json) {
listkeys(json,0);
}</script>
</head>
<body>
JSON FEED PARSER
<br/><br/>
<script src="http://beautifulbeta.blogspot.com/feeds/posts/default?alt=json-in-
script&callback=showfeedcontent"></script>
</body>
</html>


In this code replace the beautifulbeta.blogspot.com feed reference to your own blog's feed.

Open the HTML-page in your browser, and the complete feed will be displayed.
READ MORE - Delving into JSON feeds

All Feeds by Feedburner

Your blog generates feeds, you have these links on your blog pages, but how many people have actually subscribed to your feeds?
Feedburner is used by many of you to monitor those statistics. But thanks to Ramani
I recently discovered that there is something like auto-detection, that
makes other feedreaders or browsers (like Firefox) automatically detect
and subscribe to feeds. Those subscribers are not monitored in the
Feedburner-count, so here is a tutorial on how to make all feeds
available by Feedburner only. It made my statistics jump from 35
subscribers to 70 in little more than a week.

Open your template in HTML-mode. Close to the top you will find this line of code:

<b:include data='blog' name='all-head-content'/>

This
line will not expand to the code behind it, even if you check the
Expand Widget Template box. Now view your blog, right-click on it, and
from the pop-up menu select "Source" (or the equivalent menu option from
your browser). This will bring up a Notepad window, with the HTML-code
of the displayed version of your blog. Look carefully at the top lines,
and you will see that the widget-code is replaced with:

<meta content='text/html; charset=UTF-8' http-equiv='Content-Type'/>
<meta content='true' name='MSSmartTagsPreventParsing'/>
<meta content='blogger' name='generator'/>
<link
rel="alternate" type="application/atom+xml" title="YourBlogName - Atom"
href="http://yourblog.blogspot.com/feeds/posts/default" />
<link
rel="alternate" type="application/rss+xml" title="YourBlogName - RSS"
href="http://yourblog.blogspot.com/feeds/posts/default?alt=rss" />

<link
rel="service.post" type="application/atom+xml" title="YourBlogName -
Atom" href="http://www.blogger.com/feeds/yourblogid/posts/default" />
<link rel="EditURI" type="application/rsd+xml" title="RSD" href="http://beta.blogger.com/rsd.g?blogID=yourblogid" />


In
this example, YourBlogName stands for the title of your blog,
yourblog.blogspot.com is your blog's url, and yourblogid is a long
number, the id of your blog. The two lines with link rel="alternate",
indicated in red, let newsreaders auto-detect your blogs feeds. So we
have to change these lines to point them in the direction of your
Feedburner feed. We'll do this in 2 easy steps.

Step 1: Make a backup of your template.

Open your template in HTML-mode, and download the template as a backup.

Step 2: Replace the widget code.

Remove the line:

<b:include data='blog' name='all-head-content'/>

Replace it with:

<meta content='text/html; charset=UTF-8' http-equiv='Content-Type'/>
<meta content='true' name='MSSmartTagsPreventParsing'/>
<meta content='blogger' name='generator'/>
<link href='http://feeds.feedburner.com/yourblogname' rel='alternate' title='RSS' type='application/atom+xml'/>
<link
rel="service.post" type="application/atom+xml" title="YourBlogName -
Atom" href="http://www.blogger.com/feeds/yourblogid/posts/default" />
<link rel="EditURI" type="application/rsd+xml" title="RSD" href="http://beta.blogger.com/rsd.g?blogID=yourblogid" />


Replace the http://feeds.feedburner.com/yourblogname with the url to your Feedburner feed.

Now save your template.

Now
that we have fixed the auto-detection part, there is still the issue of
the feed-link on your posts page. This feed-link has to be made
invisible, so that your visitor has no other option than following the
link to your Feedburner feed.
The standard feedlink provided by Blogger is of class .feed-link.

Open your template in HTML-mode, and inside the skin look for the following line:

.feed-link {

Below this line add:

display: none;

If there is no class .feed-link defined in your template, define it with:

.feed-link { display:none; }


Now save your template.

Congratulations! Your visitors have no escape from Feedburner!
READ MORE - All Feeds by Feedburner

Google Analytics

How do people find your blog? How do they
navigate around it? Which posts are hot, and which are not? That's
interesting to know, and that's why you could start using Google
Analytics, as I do.

Google Analytics is a
free tool, that gives you important and useful feedback on visitor
behavior on your blog. The only thing you have to do is add some
html/javascript code to your blog template, and set up your Google
Analytics account, wait a few days, and watch the data roll in.

Start by setting up an account at Google Analytics.
As a Blogger user you already have a Google account, and you use the
same username and password to set up your Analytics account.
These steps are easy to follow, and will be done in just a few minutes.

Without any further setting-up, this easy setup will provide you already with interesting data. Let me show you some.

This picture shows part of the Google Analytics Desktop.

Top
left you see a graph that show the number of visitors to your blog, the
number of page-views, and as a result the average number of page-views
per visitor.
Top-right you can see that more than 40% of my visitor
are regular ones. Bottom-right you can see where visitors come from. A
lot of them seem to find my blog by means of google, but as you can see
about 10% comes from Annie's Blogger University and from Ramani at Hackosphere. And bottom-left you can see where my visitors come from. All over the world, but mostly Europe, Asia and the US of A.

Now let's take a better look at sources and keywords on how people find my blog.

As
you can see, google is by far the most important source for leading
people to my blog. Ramani is a very good source to my blog: you can see
that 227 visitors found Beautiful Beta through Hackosphere. And that
number has gone up with 2% since the last period. The top 5 keywords
that are used by people point out that most of them are looking for
templates. This makes me realize that my blog's home page has no visible
link to a templates page. You really have to scroll down to the labels
widget, click 'templates', and then you can view 3 posts that have links
to templates. So that is obviously a point to improve.
What D1 and D2 mean will be dealt with later.

Now let's take a look into the popularity of my content:

As
you can see my home page receives the most hits, which is to be
expected. Most popular posts are the Widget Installation and Downloads
page and the new Blogger Beta Template page. So it would be a good idea
to link to these posts from my sidebar. The information behind these
simple screens is vast. Did you know that over 30% from the people who
visited my downloadspage come from USA and Canada?


In a next tutorial I will tell more about defining Destination pages, setting up Conversion Funnels, and measuring Goals.
READ MORE - Google Analytics