Create Read more

 As promised that Kang Rohman will discuss about the way to make read more function at magazine Template 3, now at this post, Kang Rohman specially discusses how to make Read more function at magazine template 3.
Magazine template 3 was intentionally created without Read more function in it. I want to give you a freedom to make read more function because there are a lot of techniques to make read more function in blogspot.
Below are two techniques to make Read more function, I explain with the guides. You can choose one of them that you like most:
Making Read More technique 1
Step #1
- Log into blogger with your ID
- Click Layout
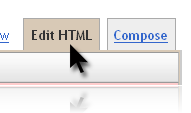
- Click Edit HTML
- Click Download Full Template and backup your template to anticipate if error occurs.
- Tick the small box beside the words Expand Widget Templates.

- Find this code
<data:post.body/>at your template (tips: press Ctrl + F on your keyboard then write<data:post.body/>and hit Enter). - Delete the code and change with the code below:
<b:if cond='data:blog.pageType == "item"'> <style>.fullpost{display:inline;}</style> <p><data:post.body/></p> <b:else/> <style>.fullpost{display:none;}</style> <p><data:post.body/></p> <div style='float:right'> <a expr:href='data:post.url'>»»  read more</a> </div> </b:if> - Click SAVE TEMPLATE.
- Done
- Click Settings tab.
- Scroll down the page and you will find the empty text area at the bottom of the page beside the words Post Template, fill out the text area with the code below:
- Click SAVE SETTINGS.
- Done
- Click Posting tab.
- Click the Edit HTML tab

- You will see the code you have made
- Write a part of your article that you want to appear on your blog before the code : <div class=”fullpost”>. For the rest of your article, you have to write after the code above and before the code: </div> . E.g. :Educational institutions in the United States demand their students have medical insurance. The policy can be the minimum available, but they must have a health insurance policy. Students have a number of plans accessible to them from their Educational Institution.<div class=”fullpost”>There are two types of group Health Insurance plans that you may choose from. You may choose either a Health Maintenance Organization (HMO) or a Preferred Provider Organization (PPO). Both the HMO and the PPO are less expensive than buying group Health Insurance.</div>
- Click Publish Post.
- Done

That is the first technique to make Read more function. If you are not familiar with this technique or if you get difficulty to apply this technique on your blog, you can still do the other alternative. This technique is more practical than the first technique because you will make Read more function automatically by using the JavaScript, thanks to kang jaloee for having posted this trick.
- Making Read more technique 2
- Login to blogger with your ID.
- Click Layout
- Click Edit HTML
- Click Download Full Template and backup your template to anticipate if error occurs.
- Tick the small box beside the words Expand Widget Templates.

- Copy and paste the JavaScript below exactly above the code
</head><script type='text/javascript'> var thumbnail_mode = "no-float" ; summary_noimg = 430; summary_img = 340; img_thumb_height = 100; img_thumb_width = 120; </script> <script type='text/javascript'> //<![CDATA[ function removeHtmlTag(strx,chop){ if(strx.indexOf("<")!=-1) { var s = strx.split("<"); for(var i=0;i<s.length;i++){ if(s[i].indexOf(">")!=-1){ s[i] = s[i].substring(s[i].indexOf(">")+1,s[i].length); } } strx = s.join(""); } chop = (chop < strx.length-1) ? chop : strx.length-2; while(strx.charAt(chop-1)!=' ' && strx.indexOf(' ',chop)!=-1) chop++; strx = strx.substring(0,chop-1); return strx+'...'; } function createSummaryAndThumb(pID){ var div = document.getElementById(pID); var imgtag = ""; var img = div.getElementsByTagName("img"); var summ = summary_noimg; if(img.length>=1) { imgtag = '<span style="float:left; padding:0px 10px 5px 0px;"><img src="'+img[0].src+'" width="'+img_thumb_width+'px" height="'+img_thumb_height+'px"/></span>'; summ = summary_img; } var summary = imgtag + '<div>' + removeHtmlTag(div.innerHTML,summ) + '</div>'; div.innerHTML = summary; } //]]> </script> - Find the code
<data:post.body/>on your template (tips: press Ctrl + F on your keyboard then write<data:post.body/>and hit Enter). - Remove the code and change with the code below:
<b:if cond='data:blog.pageType != "item"'> <div expr:id='"summary" + data:post.id'><data:post.body/></div> <script type='text/javascript'>createSummaryAndThumb("summary<data:post.id/>"); </script> <span class='rmlink' style='float:right;padding-top:20px;'> <a expr:href='data:post.url'>»»  read more</a></span> </b:if> <b:if cond='data:blog.pageType == "item"'><data:post.body/> </b:if>
- Click SAVE TEMPLATE.
- Done
summary noimg= 430 – the height of article’s cutting without image
summary img=340 – the height of article’s cutting with image
I think the tutorial to make Read more function at magazine template 3 is enough. For next questions, will be discussed at next posts. Should you have any questions about magazine template 3, feel free to ask here.