Showing posts with label tips blog. Show all posts

Display Mobile Widget Template Tip

Create the widget in the template display the mobile version is actually quite easy by simply adding a mobile property on <b:widget> widget tag. There are 3 input value on these mobile property that has meaning and purpose of each. Here's the explanation:
mobile = 'yes': means the widget will be displayed on the mobile version of the template / mobile and desktop.
mobile = 'no': means the widget will only show the template versions of desktop / web.
mobile = 'only': means the widget will only show up on the mobile version of the template / mobile.


Well after understanding the above, we have now entered the implementation method. The first step we first determine which widget you want displayed on the mobile template. My advice should simply select the two important ones such as widget widget Recent Articles and Popular Post. Suppose I want to display the widget Recent Articles and Most HOT Week on mobile template, then the way is as follows:
1. Login to blogger dashboard, then go to menu Template> Edit HTML
2. In my template, the second code is the last widget like this:

<b:widget id='HTML12' locked='false' title='Artikel Terbaru' type='HTML'>
<b:includable id='main'>
and so on ...
</b:widget>

<b:widget id='PopularPosts1' locked='false' title='This Sunday at HOT' type='PopularPosts'>
<b:includable id='main'>
and so on...
</b:widget>
3. Add property mobile = 'yes' on each widget tag so that a complete code as shown below:
<b:widget id='HTML12' mobile='yes' locked='false' title='latest article' type='HTML'>
<b:includable id='main'>
and so on ...
</ b: widget>

<b:widget id='PopularPosts1' mobile='yes' locked='false' title='This Sunday at HOT' type='PopularPosts'>
<b:includable id='main'>
and so on ...
</ b: widget>
4. Save / save your template and you're done.Create the widget in the template display the mobile version is actually quite easy by simply adding a mobile property on <b:widget> widget tag. There are 3 input value on these mobile property that has meaning and purpose of each. Here's the explanation:
mobile = 'yes': means the widget will be displayed on the mobile version of the template / mobile and desktop.
mobile = 'no': means the widget will only show the template versions of desktop / web.
mobile = 'only': means the widget will only show up on the mobile version of the template / mobile.


Well after understanding the above, we have now entered the implementation method. The first step we first determine which widgets you want displayed on the mobile template. My advice should simply select the two important ones such as widget widget Recent Articles and Popular Post. Suppose I want to display the widget Recent Articles and Most HOT Week on mobile template, then the way is as follows:
1. Login to blogger dashboard, then go to menu Template> Edit HTML.
2. In my template, the second code is the last widget like this:

<b:widget id='HTML12' locked='false' title='Artikel Terbaru' type='HTML'>
<b:includable id='main'>
and so on ...
</b:widget>

<b:widget id='PopularPosts1' locked='false' title='This Sunday at HOT' type='PopularPosts'>
<b:includable id='main'>
and so on...
</b:widget>
3. Add property mobile = 'yes' on each widget tag so that a complete code as shown below:
<b:widget id='HTML12' mobile='yes' locked='false' title='latest article' type='HTML'>
<b:includable id='main'>
and so on ...
</ b: widget>

<b:widget id='PopularPosts1' mobile='yes' locked='false' title='This Sunday at HOT' type='PopularPosts'>
<b:includable id='main'>
and so on ...
</ b: widget>
4. Save / save your template and you're done.
Noted : I Use this for hiding my pagelist for only show in mobile browser mode, because my dropdown menu i created before more efective to show only in not mobile browser mode.
READ MORE - Display Mobile Widget Template Tip

SEO Traffic Generation Tips

SEO Traffic Generation Tips

SEO, or search engine optimization is the be-all-end-all of traffic generation. The two go hand in hand. This is because, in order to gain traffic to your site your articles, your advertisements and your website

must all be search engine optimized. So, when it comes to SEO, make sure you target everything and anything around this incredibly important concept.

Essentially, there are three basic elements to SEO- keywording, linking and content. Consider keywording, linking and content the three musketeers to successful SEO. To get you started, we’ve offered the top ten tips to SEO. Keep these in mind for all your copy and content to ensure the maximum traffic generation results.

  1. Choose good keywording phrases- instead of shaping words around articles, shape articles around words. Target your content around keywords or ideas. In order to find an angle for your article, consider using Google Adwords to see which keywords are most likely searched. Then, write an article around these key phrases and terms. This may seem like an odd concept, but as soon as your brain gets used to it, the writing will flow naturally.
  2. Use keywords throughout your website, marketing and advertisement- use keywords in your title, your subheadings and in your links. If you can, even use your keyword in your URL.
  3. Link away- it is okay to link to other sites. In fact, it’s a good idea, especially if these sites are highly respected and informative. Sites with .edu and .gov are often the best because they represent a highly regarded source.
  4. Link to your heart’s content- Links do not have to just be certain words. You can also make title links and anything else you want links. People are automatically drawn to links, so switch it up andmake your content stand out.
  5. Use your anchor text in links- Make sure your link text features your keyword phrase. Links stand out on websites and most people will click through, especially if your keyword phrase is directed towards their interest.
  6. Always add new content- are you constantly updating and adding new content to your website? Well you need to be to ensure SEO success! This cannot be stressed enough. Content is what will makeor break your site so make sure your content is entertaining, up to date and informative. For more content tips, check out the Article Marketing section.
  7. Be Bold- make use of Bold HTML tags and other HTML tags to make your website stand out. Bold is beautiful.
  8. Use Alt Imaging- a picture is worth a thousand words, especially on the net. Putting alt attributes on your images can allow you to place relevant text around your image, better for search engine indexing. Keep in mind that images are searched just as much as content is.
  9. Include a site map- a site map is a great way to navigate through your site and can also be submitted to Google with XML site map. Site maps help search engine robots find every page on your website in just two clicks. What this means is better search engine results for all your web pages. Make sure you link all pages properly for the best SEO results.
  10. Follow the rules- SEO has a set of particular rules. You need to understand the legality of SEO so you don’t get banned from search engines. So how do you do this? You research. You study. You learn. Take some time and go through the basics of SEO on the main search engines. Understanding the do’s and don’ts of SEO is critical when it comes to generating traffic. After all, you SEO strategy can either make, or break your website. 
READ MORE - SEO Traffic Generation Tips

Making Mobile Version for Blog


mobilize-blogger blogPeople are just now beginning to understand that there is another option for monetizing their websites. There is the mobile option that they are probably lagging behind in.

Consider for a moment just how many people have cell phones today. Smart phones, IPhones, Tablets and such are all taking our communications to the next level. People use these devices everyday for simple things like communication and for a variety of other things like finding information that they need via the Internet. The funny thing is that they say that by the year 2012, there are going to be more phone connected to the Internet than actual computers. Think about that for a minute. Right now there is on average one phone per person per household in comparison to only one computer per household.


Mobile Version Of MY Blogger TricksIt is said that Google activates over 350,000 Android devices each day. That is not surprising considering most people use their phones for much more than just phone calls these days. Now that you are starting to realize how many people there are searching for something on the Internet via their cell phones, you are probably beginning to understand why a mobile website is so important. Normal websites just do not display very well on a hand held device. Besides, what good is having a website that most devices can not access?

A place like the Mobile Site Maker is invaluable because they can help you with your mobile website, especially since you probably have no idea where to start. In fact, getting a mobile website up and running is as simple as it gets. It does not matter what sort of mobile website you need. GMBHNews.net can help you realize your mobile website plans in very little time at all, no matter how big or small it may be. They will also help you monetize that site with Google Adsense or other advertising. They will use their own popular mobile site to launch yours as well thereby driving traffic to it in no time! With a 30-day free trial and only $9 per month for the standard plan (that's less than $ 0.50 US per Day) to create and monetize your mobile site, you can't go wrong! Other sites charge an arm and a leg  for lesser services! You simply can not beat their prices and services.

They also offer a variety of different service plans for those customer that wish to get a little more. Remember, it does not matter how small or how large your operation is. Once your mobile site is up and running you can just let it go on autopilot and make money for you even while you sleep!

The sample Video below will further help you better understand how its done.


READ MORE - Making Mobile Version for Blog

Firefox add-ons to make you a better blogger

Blogging always needs things that makes it more easier and far interesting than what it normally is. You need to do things that can make you call yourself a geek and not just a blogger. Web browsers are one of those aspects that one concentrates on, while they are blogging.

Firefox is the best browser for blogging in wordpress blogs, due to the availability of the add-ons which make the stuff more easier. To become a better blogger, here are a few firefox add-ons that would make things easier to do on your blog -

Scribefire Blog Editor – (Add-on Page)

One of the best blog editors around, that has some awesome features and integrates into the browser for posting easily into the blog. It has many options like the drag & drop, formatting the text, taking notes, uploading images and even posting into multiple blogs.

Even from the same area, you can share the posted page to various social bookmarking and networking sites like Mahalo, Propeller, Reddit, Facebook, Digg, Ma.gnolia, Fark, Stumbleupon, Newsvine etc. The add-on helps us post to various blogging platforms like Blogger, WordPress, Tumblr, Metaweblog, MovableType, Posterous.

scribefire chrome new blog Firefox add ons to make you a better blogger


Zemanta – (Add-on Page)

This add-on enhances the blogging admin panel and the mail compose section, by suggesting recommendations to a topic that you are writing. Zemanta supports WordPress, Blogger, TypePad, Movable Type, Drupal, Tumblr and email platforms Google Mail and Yahoo!Mail. The topics are searched in some of the biggest resources like Wikipedia, IMDB, Crunchbase, Google maps, Amazon etc.

zemanta Firefox add ons to make you a better blogger

Pearltrees – (Add-on Page)

It is the social way to organize, discover and share the stuff you like on the web. A pearl is like a bookmark, and it holds something that you like on the web. There are pearltrees which work like the folders for pearls, and you can organize the pearls and move them into the pearltrees. Pick the pearltrees you are most interested in and follow their activity.

pearltrees Firefox add ons to make you a better blogger

Shareaholic – (Add-on Page)

This add-on helps in sharing links from within the browser, from any webpage into various social bookmarking and social networking sites. The sites include Facebook, Twitter, Gmail, Evernote, Delicious, Digg. The add-on is optimized such that it doesn’t slow down the firefox browser. A single click lets us to reach the most frequently used URL shorteners, and you don’t need to bookmark all the sites where you share. It supports more than 100 services.

shareaholic Firefox add ons to make you a better blogger

FireFTP – (Add-on Page)

FireFTP is a free, secure, cross-platform FTP/SFTP client for Mozilla Firefox which provides easy and intuitive access to FTP/SFTP servers. Along with transferring your files quickly and efficiently, FireFTP also includes more advanced features such as: directory comparison, syncing directories while navigating, SFTP, SSL encryption, search/filtering, integrity checks, remote editing, drag & drop, file hashing, and much more.

fireftp Firefox add ons to make you a better blogger

There are several other firefox add-ons that provide the job of blog editing but Scribefire is the best of all, and there are a few tools like Screengrab that also helps bloggers with many other things.

READ MORE - Firefox add-ons to make you a better blogger

Add Background Picture to Header in CSS.

REMOVE HEADER PICTURE


The first step is to remove the old picture. Sometimes the picture refuses to get removed. Then the first remedy is to clear the cache. Always use Firefox browser for optimum logging experience.


If clearing the cache does not help login at Blogger.com and click 'Layout' link on Dashboard. On Page Elements subtab click 'Edit Html' subtab at top. In Template Code box scroll down to this code :

 <b:section class='header' id='header' maxwidgets='1' showaddelement='no'>
<b:widget id='Header1' locked='true' title='My Blog (Header)' type='Header'/>


Change this to :

 <b:section class='header' id='header' maxwidgets='3' showaddelement='yes'>
<b:widget id='Header1' locked='false' title='My Blog (Header)' type='Header'/>


Save Template. Switch to Page Elements tab. Click Edit link in the Blog Title widget. In popup window click Remove button.


Then click 'Add Page Element' link in the header. In pop up window choose 'Page Header' widget and choose the options and save. Here in the options you can add a new image or you can add it as in the next step.


ADD PICTURE AS BACKGROUND


If you want to add a picture that can be easily removed you can add it as a background in the CSS part of the template.


First create your header picture and upload it to Googlepages or Photobucket.com and copy down it's link. Make sure that the width of the picture is the same as that of the header-wrapper. (See code in next step for width of header-wrapper) If the width is not the same the picture will protrude out on one side.


Then login at Blogger.com and click 'Layout' link on Dashboard. On Page Elements subtab click 'Edit Html' subtab at top. In Template Code box scroll down to this code :

#header-wrapper {
width:660px;
margin:0 auto 10px;
border:1px solid $bordercolor;
background:url(LINK_OF_PICTURE) no-repeat;
height:200px;
}


Add the background line as shown above. Replace 'LINK_OF_PICTURE' with actual link of your uploaded picture. Change the '200px' in the height line to the actual height of the picture. Save Template. Clear Cache and view blog.


The Blog Title and description will be shown on top of the picture. If you wish you can hide the Blog title and description to show only the picture.


Read more: http://www.blogdoctor.me/2008/03/add-background-picture-to-header-in-css.html#ixzz1JwRRyb9i

READ MORE - Add Background Picture to Header in CSS.

Backlinks Idea

When you open a single post in any blog on Blogger you will find at the bottom two sentences which may mystify you. See picture below :


Click on picture to enlarge it. The first sentence is : "Links to this Post". The second is a link which may follow it closely : "Create a Link".


So you say to yourself "OK! Let's create a link!" and you click on the "Create a Link" link. Instantly a popup window comes up which mystifies you further. See picture below :


"Now what the #$@%&*##?" you say to yourself......................

Read More On "Backlinks with Bob and Alice!"


BLOG THIS WINDOW


This is the "Blog This" window. It opens the post editor in your blog with the Title and Link fields already filled in with the Title and the link of the post on which you clicked the link. Also a link to the post is present in the body of the post along with the correct anchor text.


All you have to do now is to type in your opinion or comment on the post and select the blog (if you have many blogs) you wish to publish the post in. Then on clicking the Publish button below the post is instantly published to your blog. You do not have to go through the usual route of login at Blogger.com and clicking on +New Post link on Dashboard.


What you have just done is put a link in your blog post instantly, instead of going through the normal route of coding it in. The advantage is that you do not have to leave the post, on the blog which has caught your interest, to blog about it on your own blog.


Now after publishing the post Google will index it and show the original blog that you have talked about him on your blog by putting a backlink on his blog. That backlink will point to your published post.


So the "Create a Link" link does indeed create a link but not on your blog. It is instead a backlink on someone else's blog pointing to your blog. The official Blogger Help page gives a nice example :

"For instance, suppose Alice writes a blog entry that Bob finds interesting. Bob then goes to his own blog and writes a post of his own about it, linking back to Alice's original post. Now Alice's post will automatically show that Bob has linked to it, and it will provide a short snippet of his text and a link to his post."


See picture below explaining the process :


Click on picture to enlarge it.


There is a difference in Blogger blogs. There is no short snippet as happens with trackbacks in Wordpress blogs. There are only Backlinks. See picture below of the current backlinks on How to put a picture in the Header post on this blog :


FACTS ABOUT BACKLINKS


1. You cannot create a backlink on your own post unless you put a link to it in another post.


2. You can add a "Blog This" link to your browser Toolbar. Drag this link to your browser's Links bar. Now you can instantly launch your Blog Post Editor from any site.


3. Backlinks are seen only after you enable them in Settings----->Comments----->Backlinks Show and also check "Backlinks Default for Posts" and Save Settings.


4. You can turn off showing backlinks for individual posts by clicking Post Options link in bottom left frame of the Post Editor.


5. Backlinks are shown after the link carrying post is indexed by Google BlogSearch. If you find that the post is not indexed by it you can ping Google Blogsearch manually. Copy and paste the URL or Permalink of the post carrying the link in the text box and click on "Submit Blog' button.


6. You can choose to delete the 'NO-FOLLOW' tag on your backlinks.


7. You can show the link of the post you link to as a separate 'Related Article' Link in your post footer.


8. You have to wait for a few seconds after the blog page is fully loaded before the backlinks will show up.


9. Snippets are seen on Trackbacks which are present in Wordpress blogs. At present Blogger has only backlinks. CORRECTION and UPDATE : Sorry Folks! My Bad! As Jose Lamas Rios has pointed out :
Backlinks in blogger do have snippets. Next to each backlink you'll see a triangle pointing to the right (the same one it's used for archive entries in the sidebar). When you click on it, the triangle will point down and a snippet will be shown.
Thanks for the correction Jose. Only thing is that in Wordpress the snippet is immediately seen and you do not have to click any arrow to expand it!! Thanks anyway. Much Obliged!


10. Lastly do not expect to be notified every time a backlink appears on your blog posts. There is NO backlink notification feature.


READ MORE - Backlinks Idea

Adding Powerpoint and Pdf file to Blogger Post

One method of putting Powerpoint presentations and Pdf files in your blog is by uploading them to a free host and putting the file links in your blog. This method does not allow you to actually display the files in your blog. Viewers can download the files and then view them on their PC.


Another method uses Google Presentations where you can create your presentations and show them on your blog in an iframe. This is not a very optimal method.


You can also convert Powerpoint presentations into Flash and then embed them in your blog post. 


Here is another easy method with which you can embed powerpint presentations, word documents, pdf files and audio files in your blog..................


EMBED POWERPOINT IN BLOG


Create your powerpoint presentation or have a file ready.

Create a free account at Scribd.com. Scribd is a site which lets you publish and share your files online. You can publish, convert, embed, analyze, and read documents using their custom Flash document viewer. Upload your file there and in the sidebar you will get the code under Embed. Copy and paste the code in Edit Html tab of post viewer. If you want to resize the presentation click the 'advanced' link to customize the height and width.

Read more: http://www.blogdoctor.me/2007/11/put-powerpoint-and-pdf-files-in-blog.html#ixzz1JrWAZF5U

READ MORE - Adding Powerpoint and Pdf file to Blogger Post

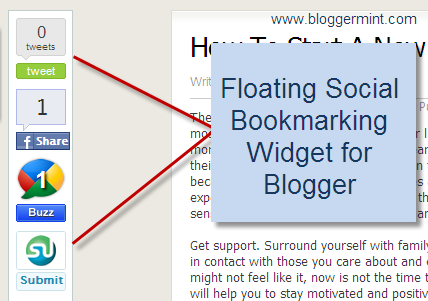
Mashable Like Floating Social Bookmarking Widget For Blogge

Its been a while many got impressed with Mashable’s floating social bookmarking widget and many tried and came up with a wordpress plugin. But actually people forgot about creating a floating social bookmarking plugin for blogger. So here in this post, I am going to teach how to add floating social widget to your blogger/blogspot blogs.

Floating Social Bookmarking Widget for Blogger

Live Demo

Step 1: Navigate to Edit HTML from Blogger dashboard and check Edit Widget Template. Search for ]]></b:skin> and replace it with the below code

01#sharebox {
02background-color:#FFFFFF;
03border-color:#C1CDCD;
04border-style:solid;
05border-width:1px;
06left:103px;
07bottom:40px;
08margin-top:10px;
09position:fixed;
10width:64px;
11}
12 
13#sharebox .float {margin:7px}
14.FBConnectButton_Text
15{
16font-size8px;
17padding:2px 4px 3px !important;
18}
19]]></b:skin>

Step 2: This step involves inserting the widget functions into your template. Therefore, place the below code before <div class=’post-header-line-1′/>

01<b:if cond='data:blog.pageType == &quot;item&quot;'>
02<div id='sharebox'>
03<div class='float'><scriptsrc='http://tweetmeme.com/i/scripts/button.js'type='text/javascript'/></div>
04<div class='float'><a href='http://www.facebook.com/sharer.php'name='fb_share' type='box_count'>Share</a><scriptsrc='http://static.ak.fbcdn.net/connect.php/js/FB.Share'type='text/javascript'/><div class='clear'/></div>
05<div class='float'><a class='google-buzz-button' data-button-style='normal-count' href='http://www.google.com/buzz/post'title='Post on Google Buzz'/>
06<script src='http://www.google.com/buzz/api/button.js'type='text/javascript'/></div>
07<div class='float'><scriptsrc='http://www.stumbleupon.com/hostedbadge.php?s=5'/></div>
08</div>
09<a href='http://www.bloggermint.com/2010/06/mashable-like-floating-social-bookmarking-widget-for-blogger/'><fontsize='0.3'>Bloggermint</font></a>
10</b:if>

Thats it and remember, the floating widget is visible only for blog post, so this widget won’t be visible on your blog homepage

READ MORE - Mashable Like Floating Social Bookmarking Widget For Blogge