


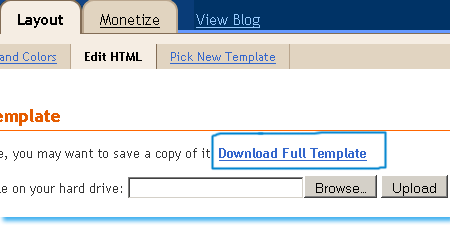
From this post The steps that must be followed for planting this TNT are, Now The Most Important Step –> Back Up Your Template By backing up your template I mean that you must save a copy of your current template in your computer hard drive. If in case something goes wrong, you can restore your template and have everything working as normal as before. To backup your template click on the link saying Download Full Template , as shown below If suppose something goes wrong , you will simply click the Browse button, locate your saved template and then simply click the Upload button to restore your template back to normal. Tip: Pressing Ctrl + F and then paste this code into the search box, as shown below, The search box is an easy way of finding codes in your template. Tip: Highlight the code below and then press Ctrl + c to copy the entire code and then press Ctrl + v to paste the code <style> And just after <data:post.body/> add the code below, <!--READ-MORE-STARTS--> <b:if cond='data:blog.pageType != "item"'> <div style="text-align: right;">Read More ->></div></a> <!--READ-MORE-STOPS--> You can replace the text in red with anything you like, e.g: Continue Reading, Keep Reading If you want to shift the "Read More->>" text to the extreme-left side, use this code: <!--READ-MORE-STARTS--> <b:if cond='data:blog.pageType != "item"'> <div style="text-align: left;">Read More ->></div></a> <!--READ-MORE-STOPS--> Read Further to know How to Apply this TNT in your Posts Now whenever you want to write a post in windows Live Writer, follow the procedure below, You will see something like this, <span class="fullpost"> </span> Now suppose if you want to show the post only till the lines I have explained everything in these images so read carefully! So you will add the codes as shown below, You can see in the image above that I have added <span class="fullpost"> just above the part of the post I wanted to hide. The text that I want to hide is the one below, “Please use windows live writer only for writing quality posts. This TNT of Read More link works best with windows Live writer. Blogger Editor is simply annoying and this trick simply just don’t work efficiently with it. If you still want to use blogger editor rather than windows live writer than frustration is what you will encounter! “ I added </span> to the part where the entire post completes or source code ends In short add <span class="fullpost"> just before the text to be hidden and add </span> just after it That’s All! You can use some of the Images below instead of that Read More –>> text To add an image instead of text simply replace Read More ->> in the code above with this, <img src=”URL Of Your Image”/> Replace URL Of Your Image with your image link.

<b:if cond='data:blog.pageType == "item"'>
span.fullpost {display:inline;}
<b:else/>
span.fullpost {display:none;}
</b:if>
</style>
<a expr:href='data:post.url'>
</b:if>
<a expr:href='data:post.url'>
</b:if>


Basic Readmore Post




Customizing Post Option From Page Template
Originally

The Page Elements wizard lets you add and re locate objects on the blog page, and maintains theblog template.
From the Page Elements wizard, you can edit the Blog Posts gadget, and configure or re locate the various blog post components, in the post template.
Find the "Blog Posts" gadget, which is the only gadget that will probably never be found in the footer, header, or sidebar, on the "Page Elements" page. Just like any other gadget in "Page Elements", Blog Posts has an "Edit" link. So click on the link, which gives you "Configure Blog Posts".

There are useful options here.
- Disable / Enable Post header elements like the date.
- Disable / Enable post footer elements (and change captions) like Poster Name, Date and Time, Comments, Backlinks, and Labels (I call my labels "Topics").
- Disable / Enable Quick Editing and Email Post Links.
- Rearrange various post footer elements into the order that pleases you.
You can change captions / formats, include or exclude altogether, and / or reposition the various elements in the post template.
- Date / time stamp.
- Author attribution.
- Author date / time stamp.
- Comments.
- Backlinks.
- Labels.
- Quick Editing pencil icon.
- Reactions buttons.
- Email Post Link envelope icon.
- Share Buttons.
- Ads Between Posts.
Note that there will be times when you can't add, reposition, or remove the Blog Posts object that you're working with. In such cases, you may have to refresh the post template.
SEO Tools For Your Blog

The Complete List of SEO Tools Being Offered are:
- Alexa Challenge
- Cloaking Detection
- Meta Tag Analyzer
- Multi PageRank
- PageRank Analysis
- SEO Challenge
- Social Bookmarks
- Spiderview
- Visual PageRank
- Website Speed Test
- Keyword Density
- Keyword Position
- Domain Age
- Domain Popularity
- Reverse IP
- Link Popularity, Backlinks
- Link Value
- Outbound Links
- Meta Tag Generator
- Sitemap Generator
- Text2Image
- Unix Time Convertor
- URL Rewrite
Why My Meta Description Appears in All Search Results?

PS: If you don’t know what Meta Description is then kindly read these posts first,
How To Make Meta Description Appear Only on Homepages?
- Go To Blogger > Design > Edit HTML
- Backup Your Templates
- Search for your meta description which lies just at top portion of your HTML editor. Mine looks like,

4. Now simply enclose your meta Description between these codes,
<b:if cond='data:blog.url == data:blog.homepageUrl'>
Meta Description Goes here
</b:if>
5. Save your template and you are Done!
Making Mobile Version for Blog

Consider for a moment just how many people have cell phones today. Smart phones, IPhones, Tablets and such are all taking our communications to the next level. People use these devices everyday for simple things like communication and for a variety of other things like finding information that they need via the Internet. The funny thing is that they say that by the year 2012, there are going to be more phone connected to the Internet than actual computers. Think about that for a minute. Right now there is on average one phone per person per household in comparison to only one computer per household.
Mobile Version Of MY Blogger TricksIt is said that Google activates over 350,000 Android devices each day. That is not surprising considering most people use their phones for much more than just phone calls these days. Now that you are starting to realize how many people there are searching for something on the Internet via their cell phones, you are probably beginning to understand why a mobile website is so important. Normal websites just do not display very well on a hand held device. Besides, what good is having a website that most devices can not access?
A place like the Mobile Site Maker is invaluable because they can help you with your mobile website, especially since you probably have no idea where to start. In fact, getting a mobile website up and running is as simple as it gets. It does not matter what sort of mobile website you need. GMBHNews.net can help you realize your mobile website plans in very little time at all, no matter how big or small it may be. They will also help you monetize that site with Google Adsense or other advertising. They will use their own popular mobile site to launch yours as well thereby driving traffic to it in no time! With a 30-day free trial and only $9 per month for the standard plan (that's less than $ 0.50 US per Day) to create and monetize your mobile site, you can't go wrong! Other sites charge an arm and a leg for lesser services! You simply can not beat their prices and services.
They also offer a variety of different service plans for those customer that wish to get a little more. Remember, it does not matter how small or how large your operation is. Once your mobile site is up and running you can just let it go on autopilot and make money for you even while you sleep!
The sample Video below will further help you better understand how its done.
Metatag SEO for Blogspot
"Auto SEO Script For Blogspot" This is coded for it<b:if cond='data:blog.pageType == "item"'>
<title><data:blog.pageName/> | <data:blog.title/></title>
<b:else/><title><data:blog.pageTitle/></title>
</b:if>
<b:if cond='data:blog.pageType == "archive"'>
<title><data:blog.pageName/> | <data:blog.title/></title>
</b:if>
<b:if cond='data:blog.pageType == "label"'>
<title><data:blog.pageName/> | <data:blog.title/></title>
</b:if>
<meta expr:content='data:blog.pageTitle + " : your blog description here (upto 200 charaters)"' name='description'/>
<meta expr:content='data:blog.pageName + ", Keyword-1, Keyword-2, Keyword-3, Keyword-4, Keyword-5"' name='keywords'/>
<meta content='Author Name Here' name='author'/>
<meta content='index,follow' name='robots'/>