Showing posts with label links. Show all posts

Create a link without an underline in HTML

 You want a link with no underline, or maybe a page full of non-underlined links? Well, let's see how to do it. The first thing to know is that you have to use a style sheet property to do this, so the trick only works in browsers that support style sheets. With that out of the way, let's take a look at how to create the non-underlined link.

For Individual Links

In order to create a non-underlined link, you need to add the style=" " attribute to your link tag. This is where the style sheet property comes in to play. The property we will use is called text-decoration, and we are going to set it so that the text has no decoration (the underline is a decoration). So, the style attribute will look like this:

style="text-decoration:none" 

Now, we want to include this attribute in the link tag. So, tack it on after your URL with a space in between the two, like this:

<a href="http://www.pageresource.com" style="text-decoration:none">The Web Design Resource</a> 
Now you will have a link without an underline, like the one below:
The Web Design Resource

For an Entire Page of Links

If you want every link on the page to be non-underlined, you can use a style sheet shortcut inside the '<head></head>' tags of your document. The code looks like this:

<style type="text/css">
a { text-decoration:none }
</style> 

Place this code between your tags, and then code your links normally. The style sheet in the head section will make them all non-underlined (unless this is overridden by another style). So, if you have this:

<style type="text/css">
a { text-decoration:none }
</style> 

Place this code between your tags, and then code your links normally. The style sheet in the head section will make them all non-underlined (unless this is overridden by another style). So, if you have this:


<html>
<head>
<style type="text/css">
a { text-decoration:none }
</style>
</head>
<body>
<p>
<a href="http://www.pageresource.com">The Web Design Resource</a>
<p>
<a href="http://www.javascriptcity.com">JavaScript City</a>
<p>
<a href="http://www.pageresource.com/html/">HTML Pit Stop</a>
</body>
</html> 

Wonderful, isn't it? Now you can have underline-free links anywhere you need them. However, non-underlined links may not be recognized as links by your viewers if they haven't seen this effect before. Then again, if the link color stands out or is the default blue, you will probably be O.K. So have fun, and link away! Oh no, did I just write a silly rhyme? Perhaps I'll write another one when I have more time! All right, I think I'd better get going now...

Well, that's all for now (and then some), see you when I write the next section!
READ MORE - Create a link without an underline in HTML

Link Building Tip: Sneaky RSS Deep Links

I wrote a while ago how to use RSS to get links to your blog. If you’re a blogger you’ve no doubt noticed there’s quite a few blogs that scrape your RSS feed & republish the content.
We all know that Duplicate content is a bad thing, however I’ve never seen any negative effects from Scraper blogs republishing my original content. I’d normally get about 2-3 blogs trackbacking me everyday republishing my articles.
If you use Wordpress it’s very easy to take full advantage of these sites linking to you, all you need to do is create links back to your content within your feed .
READ MORE - Link Building Tip: Sneaky RSS Deep Links

Using RSS Feeds for Incoming Links

Getting Search Engine Spiders to your most recent content is always a priority for most webmasters. Sometimes even getting the spiders to update your new content at all can take time when you have a new website. Here’s a tip for newer sites that should get the spiders going crazy & eating your content up.
There are a number of sites that aggregate your RSS feed & turn it into a static HTML page. This means you can submit your feed & the spiders will be able to find & follow those links.
Advantages include:
  1. The link has the anchor text of your title
  2. You can have upwards of 10 links on some pages
  3. Title of the page can be chosen, or can be the title of your blog
Here’s an example of what i’m talking about on Feedburner:
Earners Blog Feedburner
Because I show the 30 most recent posts in my feed I get 30 links back to Earners Blog. I’m pretty sure Feedburner redirects now but the spiders still follow.
Here’s a list of other sites that allow you to use a facility like this:
  1. Feedburner
  2. Bloglines
  3. Squidoo
  4. Hubpages
  5. Syndic8
  6. Feedboy
  7. Feedbomb
  8. Feedfury
  9. Feedcat
  10. Rssmad
Most of these services will require a backlink to the page with the RSS feeds so they initally get indexed by Google. Usually I open up a del.icio.us account & import all the RSS feeds then ping them from there. You should notice a nice increase in backlinks & spider activity after using this technique. Enjoy.
READ MORE - Using RSS Feeds for Incoming Links

Good Internal Linking Increases SE Rankings

Beyond the creation of a website a lot of the average “internet marketers” focus is links, links, links. More to the point, External Links.
Whilst no-one can doubt that external links are all well & good why do I consistently see people not making correct use of their own Internal Linking?
After all, using the right anchor text within your own site is bound to have some sort of effect?
This blog is a testament to that exact theory. I’ve been using various internal linking strategies since launch & I’ve had nothing but sucess in a number of different areas:
  1. Increased Indexing (A post is now normally indexed within 24 hours)
  2. Deepness of Spider Crawling
  3. Picking up More & More long tail searches (by using varying anchor text in links)
  4. Ranking on Competitive Keywords with not that many “External Links”
  5. Maintaining a high proportion of indexed pages
  6. Reducing Supplemental Results
There are 5 ways I use internal linking for maximum effect:
Have a static sitemap, this allows SE Spiders to find all your pages & also you’ve got some nice anchor text leading to each page. I use the Dagon Design sitemap for Wordpress.
Have a related posts section after every post, this means you’re automatically linking to another 5-10 posts on EVERY PAGE. This dramatically increases the crawlability of your site & also naturally boosts your rankings. I’ve found this to work quite well even for affiliate review sites.
Interlink your pages with keywords. I use SH Autolink for this. Normally when I write a post I try to think of the most appropriate Anchor Text for it. Then I link to that page with the chosen Anchor Text. Say for example I might choose Internal Linking Strategies for this page. Any time I type that word on any other post, it’ll automatically link to this post.
Refer to other posts as often as you can. This not only helps your readers explore your blogs much deeper but it also makes other posts more relevant for more & more search terms. I try to vary the anchor text I use up to 5 times to give pages the ability to rank for larger breadth of keyword terms.
Optimize your Template to include proper anchor text. For example in my template I decided to call “Home” “Earn Money” instead. This means for every post I write I’ve got a link to my home page with the anchor text “Earn Money” instead of it saying “Home.” You can do this right across the board for things like reviews, popular posts & interviews.
These are all things that you can apply to your blog quickly & easily without paying any money & without having to hunt down any external links. Write some good content & the battle is half won :)
READ MORE - Good Internal Linking Increases SE Rankings

Add Mashable Style Social Media to Blogger

You must have seen the Social Media widget that was used by Mashable for a certain period of time. This widget looks attractive and has nice effect to it, which makes it appealing to the eyes.This is great as you can get many visitors to your social media profile from them and is a great way to increase your contacts on other networks with the help of your blog. If you havent seen the widget before, then check the image below to get an idea.


Mashable Social Media Widget

It is very easy to add this widget to your blog, be it a Blogger(Blogspot) blog or a Wordpress or belonging to some other platform. However, as this blog is for blogger platform, we will explain how to add this Social Media widget to your Blogger blog.

To add it to your blog, visit the Design section of your blog and in the Page Elements section, click on Add a Gadget. In it, choose the HTML/Javascript option and paste the following code in it.


<style>
/* subscribe widget */
#subscribe1 { background:#f3f3f3; height:60px;width:288px; margin:0px 0px 15px 0px; padding:8px 5px; border:1px solid #e6e6e6; border-bottom:1px solid #e6e6e6; font-size:90%; }
.subscribe_icons { width:286px; margin:0px auto; }
.subscribe_icons li { display:inline; float:left; margin:0px 2px 5px 2px; width:52px; text-align:center; font-size:11px; }
.subscribe_icons a { display:block; padding:40px 0px 2px; -webkit-transition:all .2s ease-out; -moz-transition:all .2s ease-out; color:#444 !important; }
.subscribe_icons a:hover { color:#26b !important; text-decoration:none; -moz-box-shadow:0px 2px 4px hsla(0,0%,0%,.35); -webkit-box-shadow:0px 2px 4px hsla(0,0%,0%,.35); }
.subscribe_icons .subscribe_twitter a { background:url(http://i49.tinypic.com/2mq2es5.png) center top no-repeat; }
.subscribe_icons .subscribe_facebook a { background:url(http://i49.tinypic.com/52b7yv.png) center top no-repeat; }
.subscribe_icons .subscribe_rss a { background:url(http://i47.tinypic.com/maapvk.png) center top no-repeat; }
.subscribe_icons .subscribe_email a { background:url(http://i46.tinypic.com/2e4vgwy.png) center top no-repeat; }


</style>


<!--begin of social widget-->
        <div id='subscribe1'>
   
        <ul class='subscribe_icons'>

            <li class='subscribe_twitter'><a href='http://twitter.com/rahuljrark' rel='nofollow' target='_blank'>Twitter</a></li>

            <li class='subscribe_facebook'><a href='http://www.facebook.com/rahuljadhav' rel='nofollow' target='_blank'>Facebook</a></li>
            <li class='subscribe_rss'><a href='http://feeds2.feedburner.com/cooltricksntips' rel='nofollow' target='_blank'>RSS</a></li>
            <li class='subscribe_email'><a href='http://feedburner.google.com/fb/a/mailverify?uri=cooltricksntips&amp;loc=en_us' rel='nofollow' target='_blank'>Email</a></li>
</ul>


         <!--end .subscribe_icons--></div>


You have to change the username highlighted in red colour with your username and also the feedburner id for your blog. Now click on Save and check your blog. You should note that if your blog already uses symbols for ul and li tags, then you may face some problem with the alignment of this widget. If you are facing any problem with the placement of the widget then do tell me about it.
READ MORE - Add Mashable Style Social Media to Blogger

Adding StumbleUpon to Blogger

Like all other Social networks, StumbleUpon has also got some really elegant sharing buttons. StumbleUpon has got 6 different  sharing buttons.  You can choose any of these six. Integrating this into your blogger blog will require some template Edits.

image

How to add the Stumble Upon Counter Button  to Blogger?

1. First of all pick one of these 6 Button Styles.
2.Now Login to your Blogger Template and navigate to Design   >  Edit HTML and click on the check box which says “Expand Widget Templates”
3. Look for <data:post.body/> and immediately above it paste the following code.
<b:if cond='data:blog.pageType == "item"'>
<div style="float:right;padding:4px;">
<script expr:src='"http://www.stumbleupon.com/hostedbadge.php?s=5&amp;r=" + data:post.url'/>
</div>
</b:if>
4.Save the Template and you will see a vertical Stumbleupon counter(style 5) on your post. In the code above, you can change s=5 to s=1 or s=2 or s=3 or s=4 or s=6 to get the other button styles.
5. If you need the counter on every page, then remove the two lines of code in Green Color.
6. If you want the button to appear on the left side, then change float:right to float:left
READ MORE - Adding StumbleUpon to Blogger

Adding Facebook Like Box to Blogger

Facebook Like Button allows you to provide more Sharing Options to your Readers. Your readers can share your posts on Facebook using the Like Button. Have you added the Like button and still not getting any “Likes”? :(. Ok then we will present the Like button in a much better and elegant way.
Here is a Screenshot of the Facebook Like Box. Isn’t it lovely and more “Likable” than the default Like Button?
image
The  Facebook Like box also includes a link to  your Facebook Fan Page. This FB Like Box was Designed Styled and coded by Mia of Dezign Matterz .  Thanks to her for designing and styling  this awesome Like Box.

How to install the Facebook Like Box?

1. First Fill in the following Details (Code will be updated with these details)
Width of the Like Box                     (Enter the appropriate width of the FB like box)
Facebook Fan Page / Profile URL
2. Now Login to your Blogger Account and navigate to Design > Edit HTML and check the option which says “Expand Widget Templates”
3. Look for  ]]></b:skin> in your template and just above that place the following code (You can use Ctrl +F to find the code).
.fb_like_box {
margin-top:10px;
-moz-border-radius:10px 10px 10px 10px;
border-radius:10px;
background-color:#3B5999;
border:3px solid #2B2B2B;
margin-bottom:10px;
padding:10px 7px;
width:540px;
}
.fb_like_top {
overflow:visible;
padding:0;margin:0 0 5px;
width:349px;
height:24px;
background:url("https://blogger.googleusercontent.com/img/b/R29vZ2xl/AVvXsEjP2adY9DVslrP2SE-b_bJQafPPLNW_M9lIejrdAtBlXc3sEl2t_44TgmHnoWZ9sEHo5NyF8qdnre119EE_PQ0rccZwLp0i_KnI0L_C2zRvNy-pL7ocK_EabQkG-yPY1TI6lZ-GgMeULQ0/") no-repeat scroll left top transparent;
}
.fb_like_button_holder {
-moz-border-radius:10px 10px 10px 10px;
border-radius:10px;
background:none repeat scroll 0 0 #FFFFFF;
padding:12px 12px 0 12px;
width:515px;
height:42px;
}
4. Now Look for <data:post.body/> in your template and just below that add the following code.
<b:if cond='data:blog.pageType == &quot;item&quot;'>
<div class='fb_like_box'>
<div class='fb_like_top'></div>
<div class='fb_like_button_holder'>
<iframe allowTransparency='true' expr:src='&quot;http://www.facebook.com/plugins/like.php?href=&quot; + data:post.url + &quot;&amp;layout=standard&amp;show_faces=false&amp;width=100&amp;action=like&amp;font=arial&amp;colorscheme=light&quot;' frameborder='0' scrolling='no' style='border:none; overflow:hidden; width:450px;height:30px;'/>
</div>
</div>
</b:if>
5. Now Save your template and you will see a Facebook Like Box on your post pages.
READ MORE - Adding Facebook Like Box to Blogger

Traffic Exchange Resources

Recommended Traffic Exchange Resources 

Splash Page Maker
Easily Build Splash Pages
AWeber
The Best Autoresponder On The Web
Affiliate Funnel
Your downline builder
HitsConnect
Ad Tracking and Rotator System, Providing detailed statistics for your TE campaigns.
Instant Squeeze Page Generator
Build your own custom squeeze pages in 3 easy steps.
Discover Cpanel
Step-by-step video tutorials.
READ MORE - Traffic Exchange Resources

Better Ranks with Links

The main search engines like links. They like outside sites linking into yours, but they also like links within your site going to other pages. So in this case having more pages can be useful. Also since you now have all these pages that you are linking to it gives you a great place to use some more keywords. Make sure that your links include your keywords. But, and this could have been in section 4 above, don't create "doorway pages" that redirect you to another page. It used to be common SEO practice to create lots of doorway pages, each one stuffed with specific keywords, all of which would redirect the visitor to the actual page they were looking for. This would give your site lots of pages, with lots of internal links and would allow you to tightly optimize these doorway pages for specific keywords, but the search engines have gotten wise to this trick and now penalize the use of redirect pages. So don't use redirects unless you absolutely need to and never use doorway pages
READ MORE - Better Ranks with Links

Traffic Exchange Downlines

This should be seen as a warning... because I see so many people going about this the wrong way. You should not focus too much time, money and energy on building traffic exchange downlines, you will rarely get enough out of it to justify it.

Don't get me wrong, having big traffic exchange downlines is nice, but it should never be your aim. You are much better off focusing all your traffic on your own offer. Get people to sign up for your list and then you can introduce them to your recommended traffic exchanges or downline builders (on the thank you page or in your email series).

In other word build your own business first and then build downlines on the backend as part of your own marketing funnel.

Note that you can rebrand the Dragon Surf ebook from the affiliate toolbox in the members area. It's a perfect gift for your thank you pages and/or email series + it will build you downlines in a number of good programs (including Dragon Surf).


Traffic Exchange Downlines 

What's In It For You?

Almost all traffic exchange will award you a % of the credits your referrals earn. This can amount to a nice trickle of traffic over time, but as I mentioned above it's very rarely enough to justify an "all in" promotion.

Some traffic exchange, like Dragon Surf, will also offer you some nice cash commissions when your referrals buy something. It makes a bit more sense to promote these exchanges, but you are still much better off building your own list/business and then recommending them on your backend.

Quite a few traffic exchange will let you email your downline (or send a private message). This can be a very powerful tool. Use it to network and build relationships and to get people on to your own mailing list (if you did it the right way they should already be there).

This Is How I Build Downlines... 

I only advertise Dragon Surf and my own lead capture pages on the traffic exchanges. I get people into my program and onto my list. Then I will have "recommended places to advertise" in my members area, on thank you pages, in my AR email series etc. The Squidoo Lens you are looking at right now is a prime example of this approach.

Focusing on building my own list also lets me send out an email and build an instant downline whenever a great new traffic exchange or advertising resource is launching.

I tend to use downline builders a lot becuase it's a more cost effective way for me to do it (I can recommend multiple programs with one link). But, like with individual traffic exchanges, downline builders should be something you recommend after you have gotten people into your own marketing funnel.

Here are some of the downline builder I use and what I like about them...

Affiliate Funnel 


Affiliate Funnel is a great downline builder with a lot of unique features (they are constantly adding new).

The also have some great training material, including weekly training seminars (I'm usually attending those).

However, the best part about Affiliate Funnel is that you get to advertise squeeze pages that build your own list. You then automatically recommend Affiliate Funnel and the programs inside on the back end.

This is downline building the way it was meant to be!

Residual Traffic System 


This is Steve Ayling's newest program and it has been working great for me. It's a downline builder with a lot of quality exchanges and traffic exchange related programs.

However, the best thing about it is that every referral you get will be automatically added to your own AR list. So you can build your list and downlines at the same time.

Check out the Residual Traffic System today!

Traffic Hoopla 


The Hoopla guys have been around forever. While I don't always agree with the way they rank traffic exchange, Traffic Hoopla continues to be a very effective downline builder for traffic exchange and safelist.

Note that their top list are based purely on statistics not on conversion tracking, in other words it should be seen as a base for your own tracking... not the be all end all list of top exchanges.

Check out Traffic Hoopla here!

Downline Builders In Traffic Exchanges 

Many traffic exchanges (and other advertising programs) have "in house" downline builders.

While it's not essential, I do recommend that you take the time to enter your program IDs, especially if you are referring a lot of people.

Think of it as setting a lot of small landmines, the more places you have your affiliate link the greater the chance that someone will "trip" over it.

Generalen Downline Builder 

The latest program from my busy Norwegian friend Kenneth Kraakstad. It sports downline building in some great exchanges, list builders and affiliate programs.

It works great as a downline builder, but it also features some advertising resources that I haven't really tested yet. As I said Kenneth is a busy man and I'm sure he will be adding a lot of cool features to this program.

Check out The General here!

PageSwirl 

And last but not least we have PageSwirl from Dan Moses. It's great downline builder but more importantly it also features some great tools for traffic exchange surfers including a free rotator service.

Take a look at PageSwirl here.
READ MORE - Traffic Exchange Downlines

Increase your Link Visibility Using Web 2.0 Buttons

Now a days, Web 2.0 applications is being most popular to spice up the website with advanced new features. Web 2.0 applications is used to enhance the visibility of anything like Web templates, buttons, Icons and so on. Using Web 2.0 application, you can make your blog looks like professional and formal layouts.


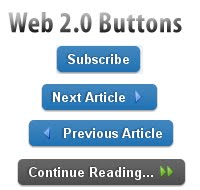
Web 2.0 Buttons for Websites

I've been using the buttons provided by Google on my blog. Actually, we can call it as Web 2.0 buttons. Definitely, you may want to apply such professional looking buttons instead of undesirable links on your blog. Let see we can use the Web 2.0 buttons.

On Subscription Box

Watch on the top right sidebar of this blog, you'll see the subscribe button. Now, compare that subscribe button with your blog's subscription button. But the stupid Internet Explorer doesn't supports for curved buttons. So it may be undesirable view on Internet Explorer.


As Read More Button

Go to the Homepage of this blog. And watch for the Continue Reading button that you can see below each post. This one is click able. When you see that button you may intend to click it.

Have you noticed that each of the Blogger Template which I have made consist of read more link?

Older Post and Newer Post
Many Blogger blog users were having problem with page navigation links. Older post, Newer Post and Home links were not visible but fortunately , I solved that problem. You can see these button on each post of this blog.

These are the existing place where I used Web 2.0 buttons. But, you can use everywhere that you want.

Let see how you can use this on your blog. First off all, download CSS code from here and upload it on your server. Add the Link to CSS where you have uploaded. For example: <link rel="stylesheet" href="/style.css" type="text/css"  /> 

Replace /style.css with the URL where you have hosted CSS code. Now, you are ready to use these button. Use this code to embed Web 2.0 buttons on your blog:

<button class="sexybutton"><span><span><span class="ok">Submit</span></span></span></button>

You found the complete information and tips from here.

Hope you've used such nice looking Web 2.0 buttons on your website and blog. Let me know if there is any obstacle and error while doing this process on your blog.
READ MORE - Increase your Link Visibility Using Web 2.0 Buttons

Recommended List for Make Money For Your Blogs

Here is some recommended advertising networks which rivaled with Adsense:

Popular Advertising Networks
  1. Chitika (CPC)
  2. Burst Media : Large network. (CPM)
  3. Commission Junction : Large network. (CPA)
  4. Kanoodle : Large network. (CPC); 50% payout.
  5. LinkShare : Large network. (CPA)
  6. ValueClick : Large network. (CPM)
  7. Yahoo Publisher Network : Closed Beta (CPC)
  8. MSN adCenter : Closed Beta (CPC)

Secondary Advertising Networks
  1. Accelerator Media :
  2. AdAgency 1 : (CPM)
  3. AdDynamix : (CPM)
  4. AdEngage :
  5. Adgenta :
  6. Adhearus :
  7. AdKnowledge : (CPC)
  8. AdPepper : (CPM)
  9. ADServing Network : (CPM)
  10. Adsmart : (CPM)
  11. Adtegrity : (CPM)
  12. AdZuba : (CPM)
  13. AffiliateFuture : (CPA)
  14. AffiliateSensor :
  15. AllFeeds : (CPC)
  16. AVNads :
  17. AzoogleAds : (CPA)
  18. Banner Boxes : (CPC)
  19. BannerConnect : (CPM)
  20. BardzoMedia : (CPM)
  21. BidClix : (CPC)
  22. BidVertiser : (CPC)
  23. BlinkAds : (CPA)
  24. BlueFN : (CPA)
  25. BlueLithium : (CPM)
  26. Casale Media : (CPM)
  27. ClickAdsDirect :
  28. ClickBooth : (CPA)
  29. ClickShare :
  30. Clicksor : (CPC)
  31. ClickXchange : (CPA)
  32. ContexWeb : (CPC)
  33. CoverClicks :
  34. CPX Interactive/Budsinc : (CPM)
  35. DirectNetworks : (CPA)
  36. Enhance Interactive :
  37. Esource Media : (CPM)
  38. Etype-Europe : (CPM)
  39. EtypeUSA :
  40. ExpoActive :
  41. FastClick=ValueClick : (CPM)
  42. FluxAds : (CPA)
  43. HurricaneDigitalMedia : (CPM)
  44. Hyperbidder : (CPC)
  45. IncentaClick : (CPA)
  46. Industry Brains :
  47. Interclick :
  48. JoeTec : (CPM)
  49. Kontera : (CPC)
  50. Mamma Media Solutions : (CPC)
  51. MaxBounty : (CPA)
  52. Mirago :
  53. MIVA AdRevenue Xpress :
  54. Nixxie :
  55. Oridian : (CPA)
  56. Oxado : (CPC)
  57. Paypopup : (CPM)
  58. PeakClick :
  59. PogAds : (CPC)
  60. Popup Traffic : (CPM)
  61. Quigo : (CPC)
  62. RealCastMedia : (CPM)
  63. RealTech Network : (CPM)
  64. Revenue Pilot : (CPC)
  65. RightMedia : (CPM)
  66. Searchfeed : (CPC)
  67. ShareAShare : (CPA)
  68. TargetPoint : (CPC) payout.
  69. TextLinkAds : (CPC)
  70. TMP Express : (CPA)
  71. Tremor Network :
  72. Tribal Fusion : (CPM)
  73. Veoda : (CPC)
  74. Vibrant Media IntelliTXT : (CPM)
CPA stands for Cost Per Acquisition, CPC stands for Cost Per Click and CPM stands for Cost Per thousand Impression, In Latin Mille known as Thousand. Definitely, all of these networks are alive right now. I hope this huge list helps you to monetize your blog.
READ MORE - Recommended List for Make Money For Your Blogs

How To Add Twitter Follow me Button to Blogger/Website

1.Login to your blogger dashboard--> layout- -> Edit HTML

2.Click on "Expand Widget Templates"

3.Scroll down to where you see below code:

<div class='post-header-line-1'/>

4.Now Copy your "Tweetmeme Follow Button" code and paste it just below the above code.

NOTE: If you can't find <div class='post-header-line-1'/> in your template, paste your "Tweetmeme Follow Button" code just before <data:post.body/> .

Code 1:
<div style='float:right; margin-right:10px;'>

<script type="text/javascript">
tweetmeme_screen_name = 'yourtwitterusername';
</script>
<script type="text/javascript" src="http://tweetmeme.com/i/scripts/follow.js"></script>

</div>

See the Result


Code 2:
<div style='float:right; margin-right:10px;'>

<script type="text/javascript">
tweetmeme_screen_name = 'yourtwitterusername';
tweetmeme_style = 'compact';
</script>

<script type="text/javascript" src="http://tweetmeme.com/i/scripts/follow.js"></script>

</div>

See the Result

Code 3:
<div style='float:right; margin-right:10px;'>

<script type="text/javascript">

tweetmeme_screen_name = 'yourtwitterusername';
tweetmeme_style = 'square';
tweetmeme_size = '50';
</script>

<script type="text/javascript" src="http://tweetmeme.com/i/scripts/follow.js"></script>

</div>

See the Result


NOTE : Remember to replace yourtwitterusername with your real twitter username.

If you are not a blogger,you can too add this code simply your website.

5.Now save your template and you are done.
READ MORE - How To Add Twitter Follow me Button to Blogger/Website

Add A TweetMeme Retweet Button To Blogger Blog

Tweetmeme Retweet button


With the increase in the popularity of Twitter, it has become a great place to share information on the net. Many bloggers have stated that Twitter is among the top sources from where their blog gets traffic. Even I have experienced the traffic that Twitter can send to blogs. Few days back, my post 16 Cool Sites To Get Free Twitter Backgrounds spread rapidly on Twitter and was Retweeted more than 150 times and I got 700+ Unique visitors in just 2 hours!!! and I got more than 1k unique visits that day. So its important that you add a Retweet button on your blog so that you can get more traffic to your blog.

Tweetmeme has provided a nice and simple option to add a Retweet button to blogs. Here are the two types of RT buttons.

Tweetmeme Retweet button


To add the RT button to your blogger blog, visit the Layout option and select the Edit HTML option. Now select the Expand Widget Templates option and search the following code in the template


<div class='post-header-line-1'>


If you want to add the big RT button, then paste the following code below the code shown above


<script type='text/javascript'>
tweetmeme_url=&#39;<data:post.url/>&#39;;
</script>
<script src='http://tweetmeme.com/i/scripts/button.js' type='text/javascript'>
</script>


However, if you want the compact button, then add the following code


<script type='text/javascript'>
tweetmeme_url=&#39;<data:post.url/>&#39;;
tweetmeme_style = 'compact';
</script>
<script src='http://tweetmeme.com/i/scripts/button.js' type='text/javascript'>
</script>


But when anyone clicks on the RT button, the RT contains RT @tweetmeme in the tweet. But you can replace it with your Twitter username as you will come to know when someone RT's your post. To use a RT button with your Twitter username, use the following code


<script type='text/javascript'>
tweetmeme_url=&#39;<data:post.url/>&#39;;
tweetmeme_source =&#39;Your Username&#39;;
</script>
<script src='http://tweetmeme.com/i/scripts/button.js' type='text/javascript'>
</script>


You can also specify the URL shortner to be used for the RT button. Following is an example


<script type='text/javascript'>
tweetmeme_url=&#39;<data:post.url/>&#39;;
tweetmeme_source =&#39;Your Username&#39;;
tweetmeme_service = &#39;bit.ly&#39;;
</script>
<script src='http://tweetmeme.com/i/scripts/button.js' type='text/javascript'>
</script>


You can replace bit.ly with the following URL Shortening services

  • bit.ly
  • awe.sm (API support)
  • cli.gs
  • digg.com (API support)
  • is.gd
  • TinyURL.com
  • tr.im
  • su.pr (API support)
  • ow.ly
  • twurl.nl


If you want to add URL shortening services that need API support, then use the following code


<script type='text/javascript'>
tweetmeme_url = &#39;<data:post.url/>&#39;;
tweetmeme_source =&#39;Your Username&#39;;
tweetmeme_service = &#39;su.pr&#39;;
tweetmeme_service_api = &#39;Your API Code&#39;;
</script>
<script src='http://tweetmeme.com/i/scripts/button.js' type='text/javascript'> </script>


To get the API code, you first need to create an account for that URL shortening service and then get the API Code from the account

That's it, I hope that you have found this post useful. If you have any problems, then do write a comment to tell me about it. You can also write a post to tell me your opinion about this post.
READ MORE - Add A TweetMeme Retweet Button To Blogger Blog

How To Manage External Links Using JQuery

How To Manage External Links Using JQuery

 In this tutorial I am going to show how to style your external links differently from the other links using Jquery.Also after adding this trick to your blogger blog or web site,all external link of your site will open in new window.This is very easy to do and you can view a DEMO HERE.If you want to know further details about this trick you can read this : http://www.madeincima.eu/blog/jquery-tutorial-external-links/

Now to add this jquery external links effect to your site follow the steps given below.


1.Login to your blogger dashboard--> Design - -> Edit HTML.

2.Scroll down to where you see </head> tag .

3.Copy below code and paste it just before the </head> tag .

<script type="text/javascript" src="http://ajax.googleapis.com/ajax/libs/jquery/1.4.2/jquery.min.js"></script>

<script type="text/javascript">
/*

    jQuery - External Links
    Created by Andrea Cima Serniotti - http://www.madeincima.eu

*/


$(document).ready(function () {

        // ---- External Links ----------------------------------------------------------------------------------------------------

            $("a[href*='http://']:not([href*='"+location.hostname+"']),[href*='https://']:not([href*='"+location.hostname+"'])").attr("target","_blank").attr("title","Opens new window").addClass("external");

});
</script>

<style type="text/css">
.external{background:url(https://blogger.googleusercontent.com/img/b/R29vZ2xl/AVvXsEgKFU3yvnAnDj6OGsQJgnre76Z1bAPPreyI-F4r88wANgapi4bJYeT3N6DkJvPXX9HLDwtwLCMoIxbQ8Wnw4ZHEmDQssg-tVPekv0HHMWiq145rQwd0GsJKvkfq5-TLsZB6-uox5ZDSUzA/s1600/external_link.gif) top right no-repeat;padding-right:18px}
</style>


4.Now save your template.

You are done.Now all of your external links open in new windows and can identify external links from other links.
READ MORE - How To Manage External Links Using JQuery